The original concept was to have a small low power, solid state, cost effective monitoring & control device to assist System Administrators. Based around the ATMega328 chipset, it was web connected so it could fetch instructions from a web CMS automatically, which required a custom memory mapping technique to store them similar to a basic file system.
The features included:
- Relay (headphone jack)
- Infra red transmission
- Led indicator
- Speaker
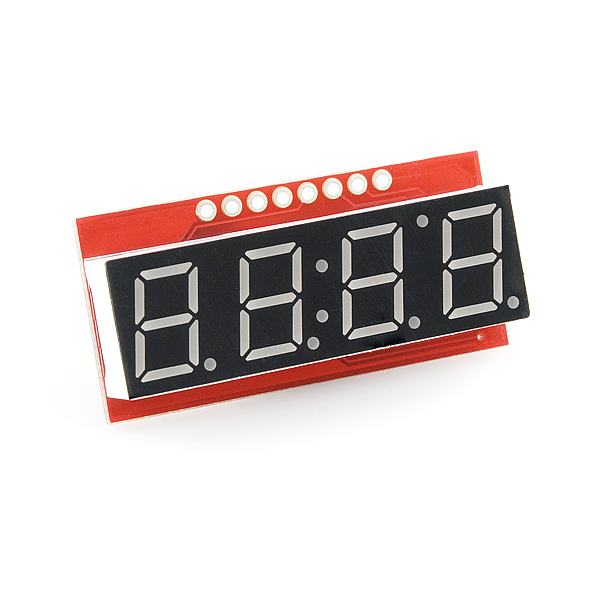
- Numeric display (with partial text display, scrolling, and clock)
- Thermometer
- Usb power
- Network monitoring (ping, http loading)
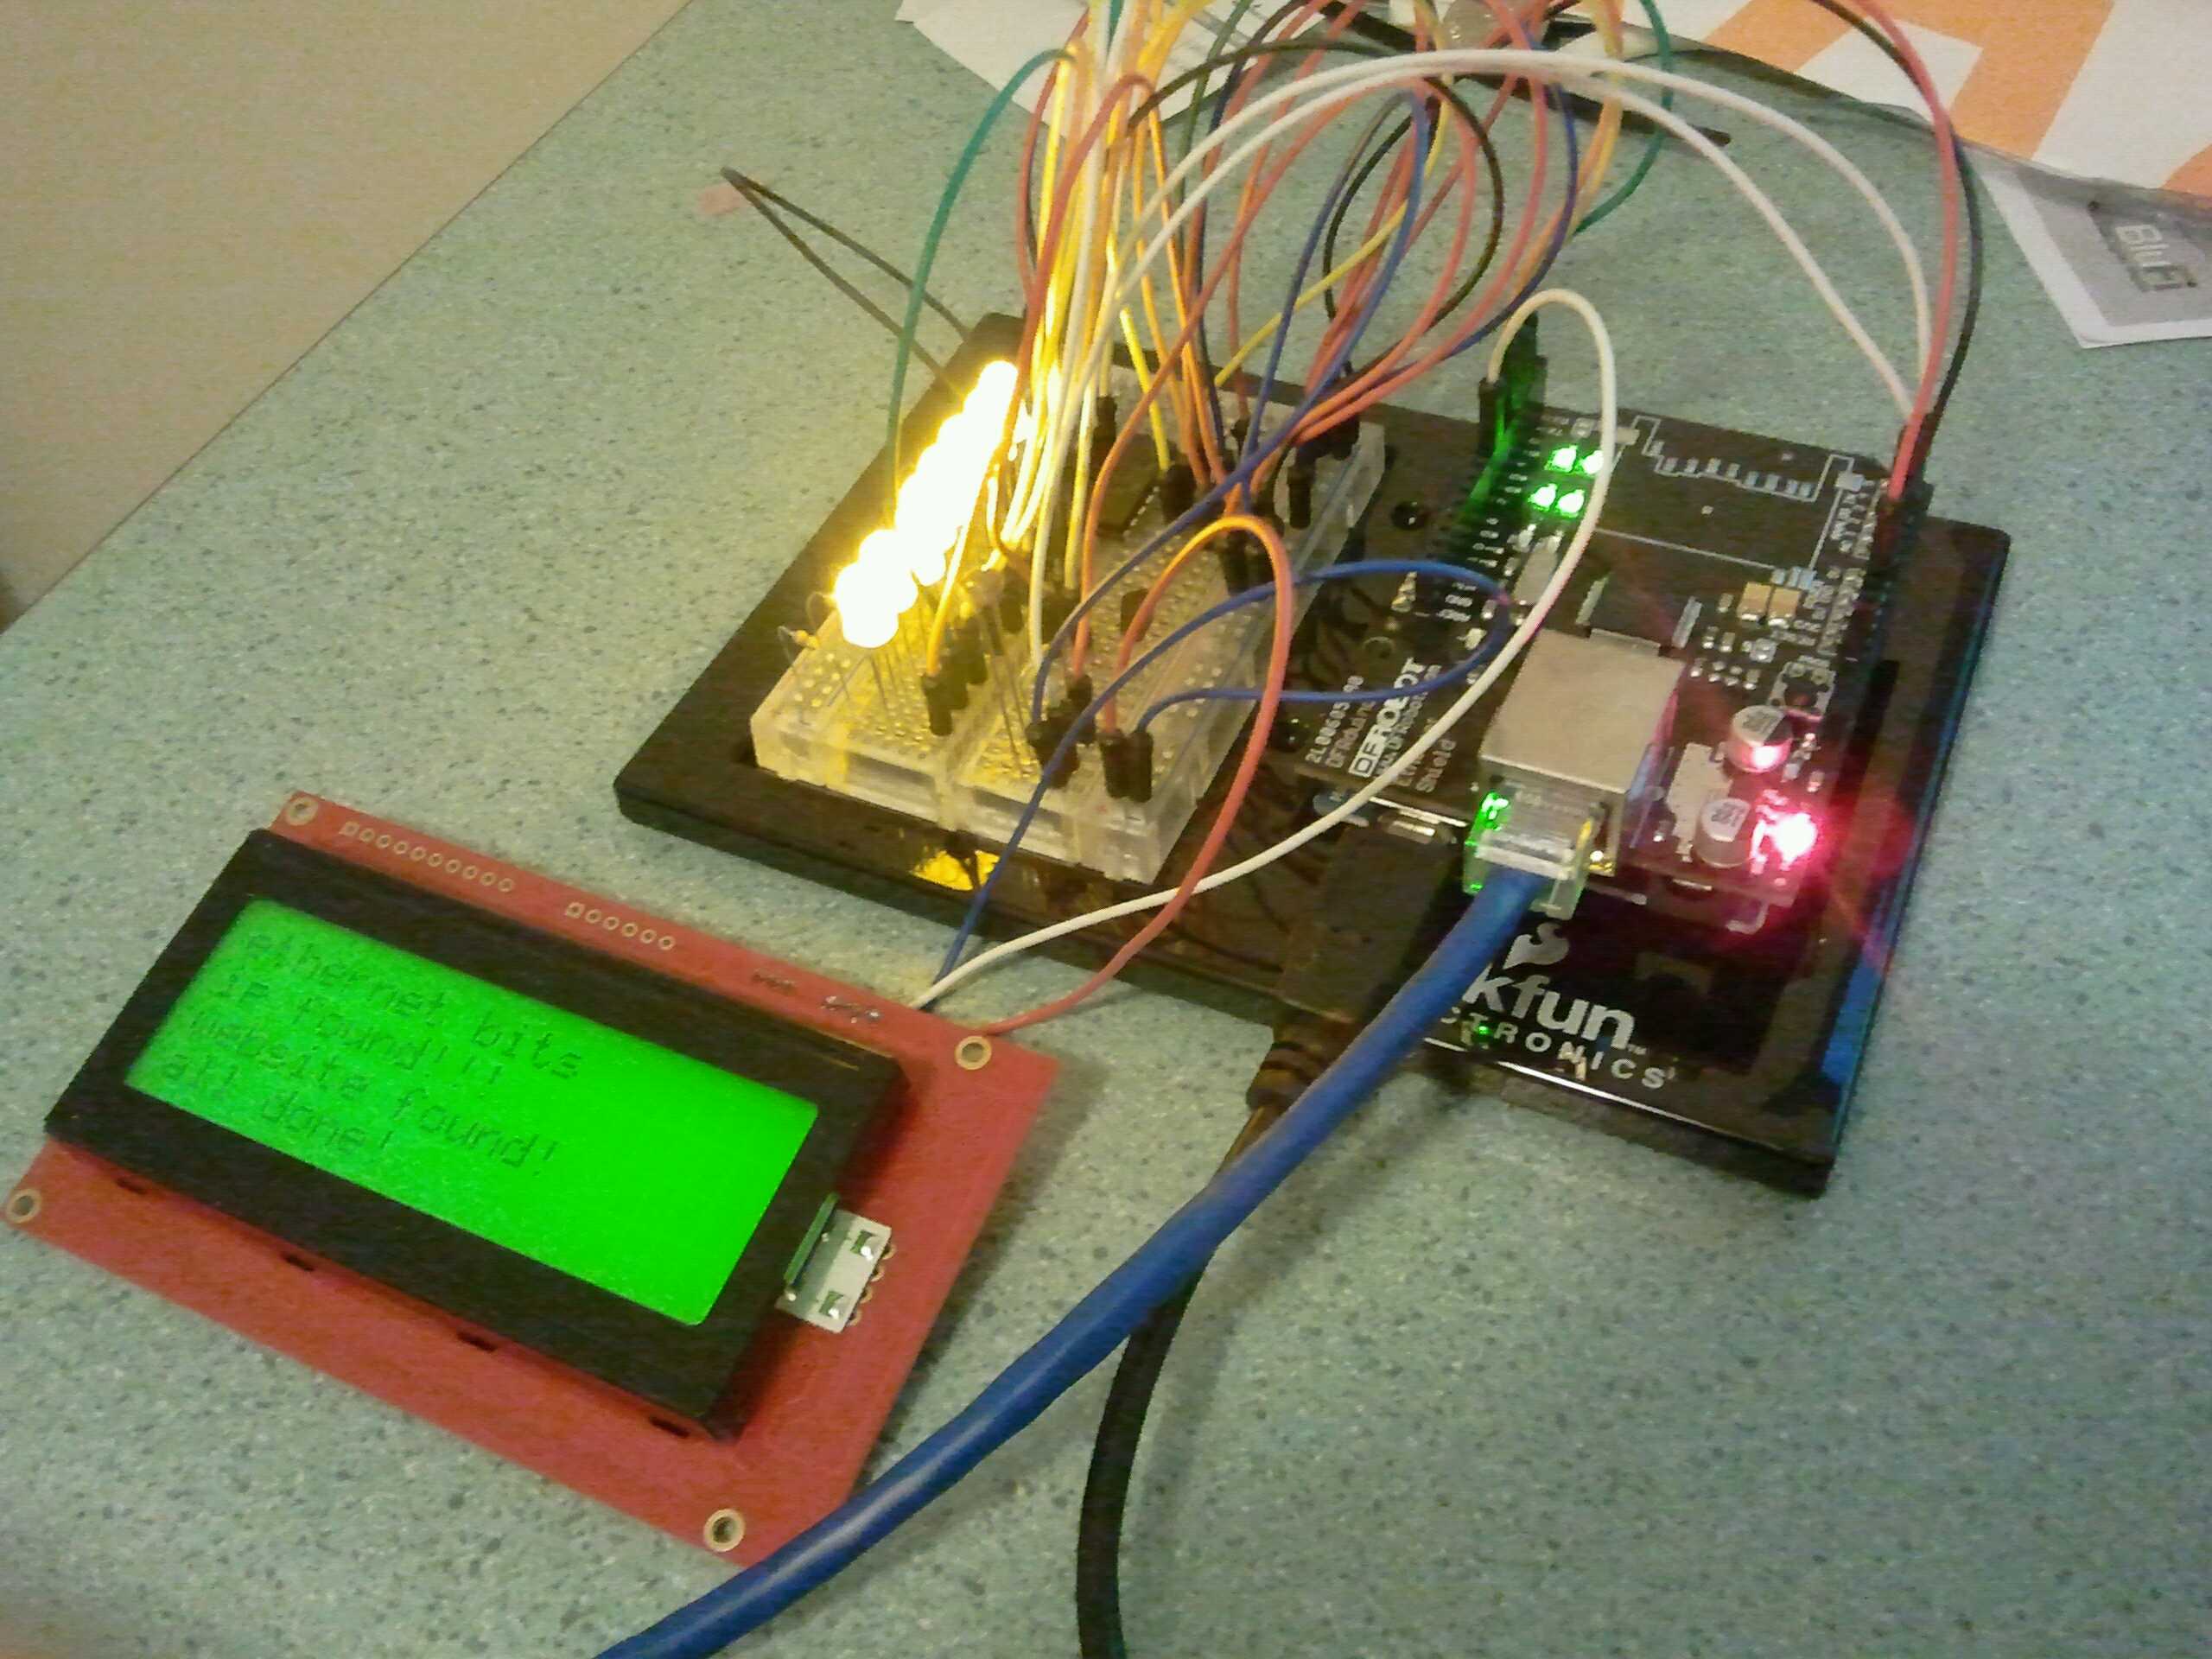
Early testing seemed like this was possible so I went off to build a proper prototype.
The parts
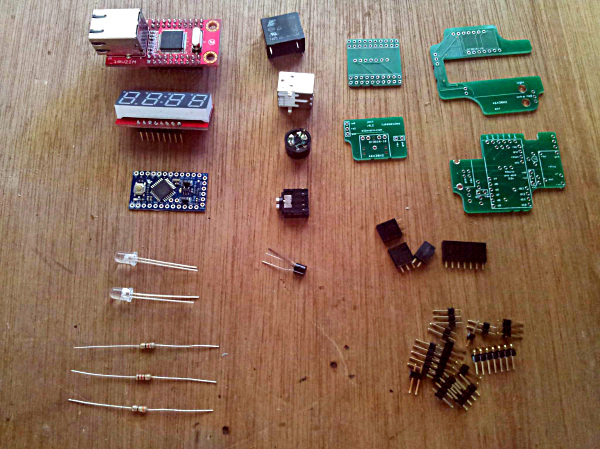
This project centered around 3 core pre-made boards.
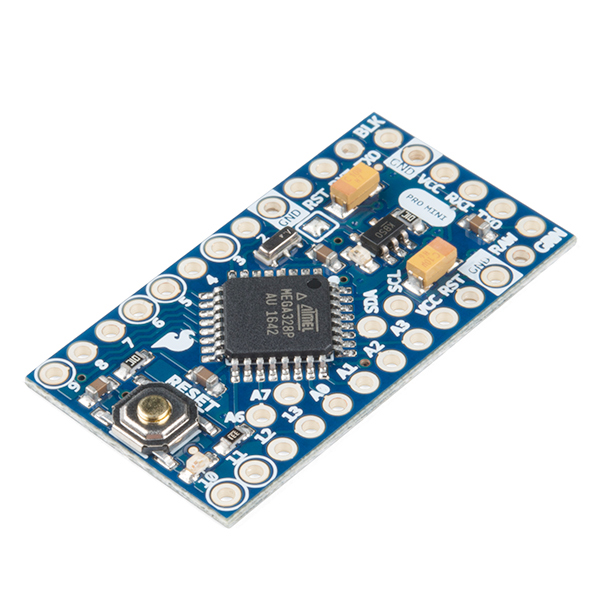
Arduino pro mini 3.3v. This is available almost everywhere, there are plenty of 3rd party clones which are all perfect. And very cheap. These are a stripped down version of an Arduino Uno where you need your own FTDI programmer.
Wiznet ethernet board allowing for a cabled connection to the world from an Arduino. These come with the pins on already.

7 Segment display
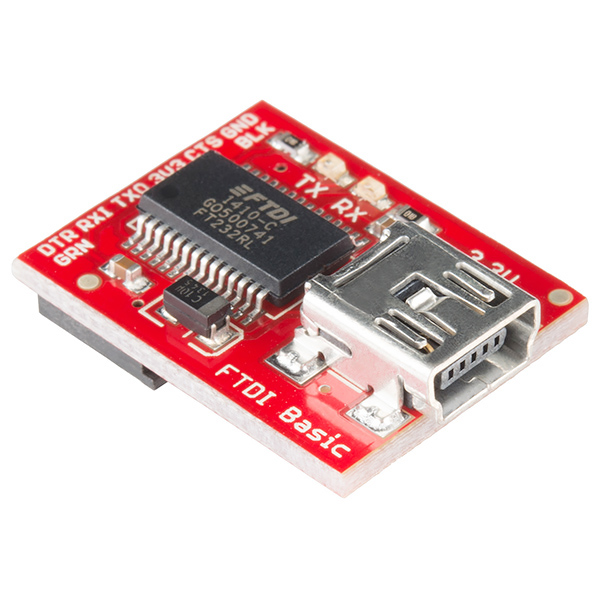
An FTDI programmer. This isn’t contained within the enclosure, but is required to program the Arduino Pro Mini. It’s essentially all the USB parts that don’t come with the Arduino Pro Mini.
What will it look like?
There were a few considerations for this
- It needed to fit within a compact readily available enclosure
- It had to incorporate a few off the shelf boards/components, along with some custom made boards that would join it all together
- Any modifications to the enclosure needed to be as simple as possible eg. round holes which can be drilled if possible.
- The enclosure needed a clear top, in order to allow the visibility of the display and leds within, and the infra-red transmission led to shine through.
I ended up finding a small enclosure that is readily available even locally, but could be ordered in custom colours including a clear top. So I purchased one of the local ones for fitout testing. Time to see what I could fit in it.
Fitting it all
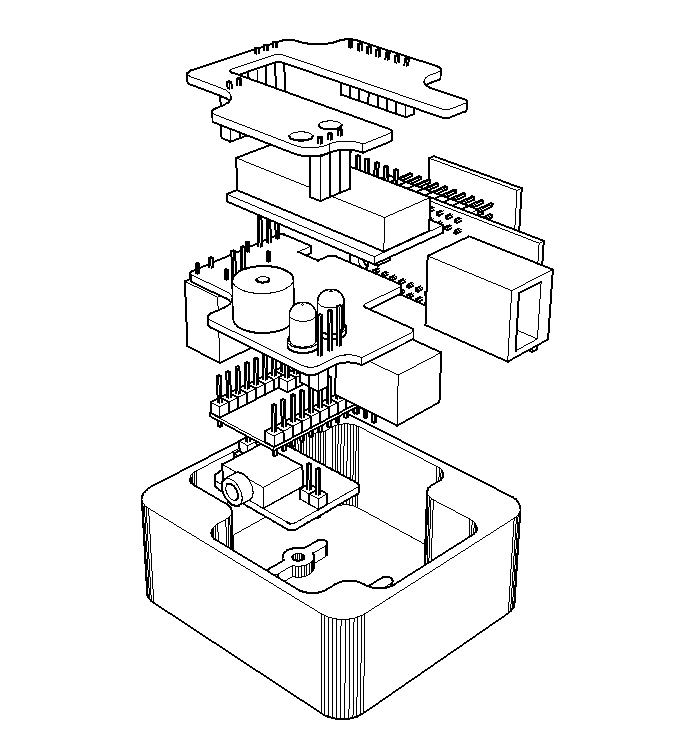
The first task was trying to design around all the components I couldn’t change which were listed above. I ended up modelling all of the parts in Rhino3D (CAD) to see where it would all fit, what boards there would be, and where to place all the holes.
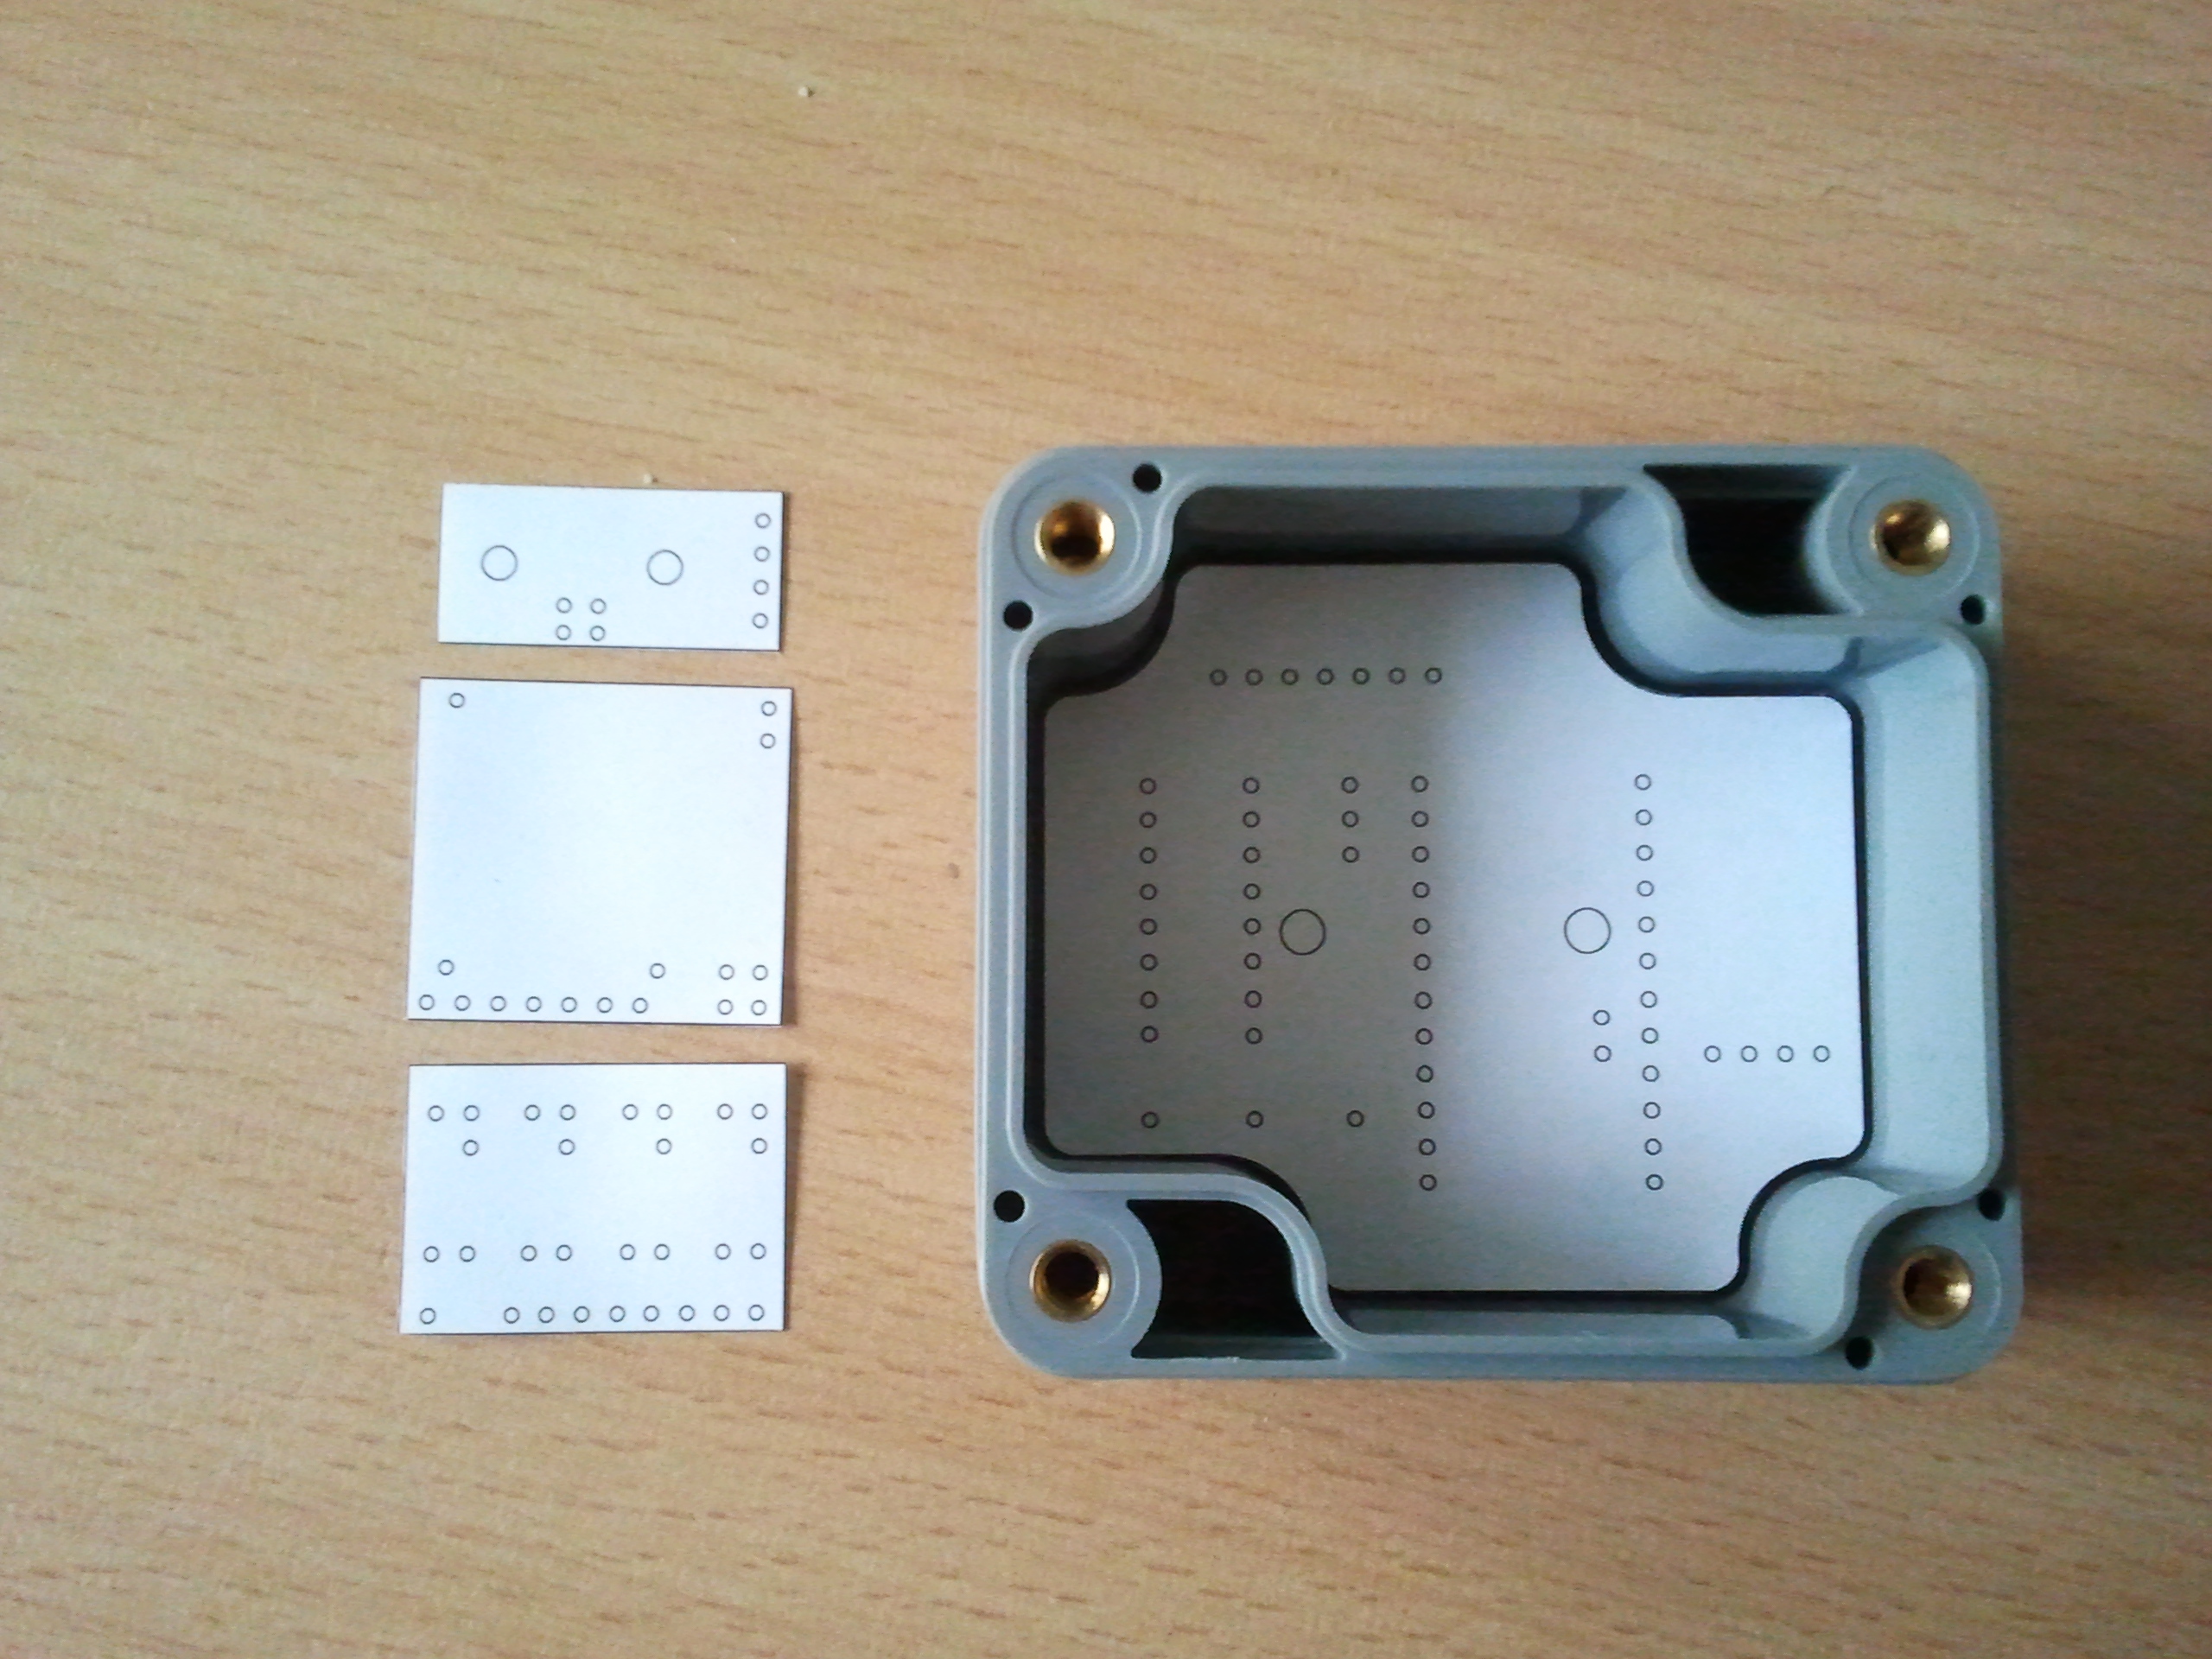
Armed with how big each board would be and knowing it will fit in the enclosure, it was time for a makeshift physical test of it. I printed out the boards to see if it would appear ok.
Circuit design
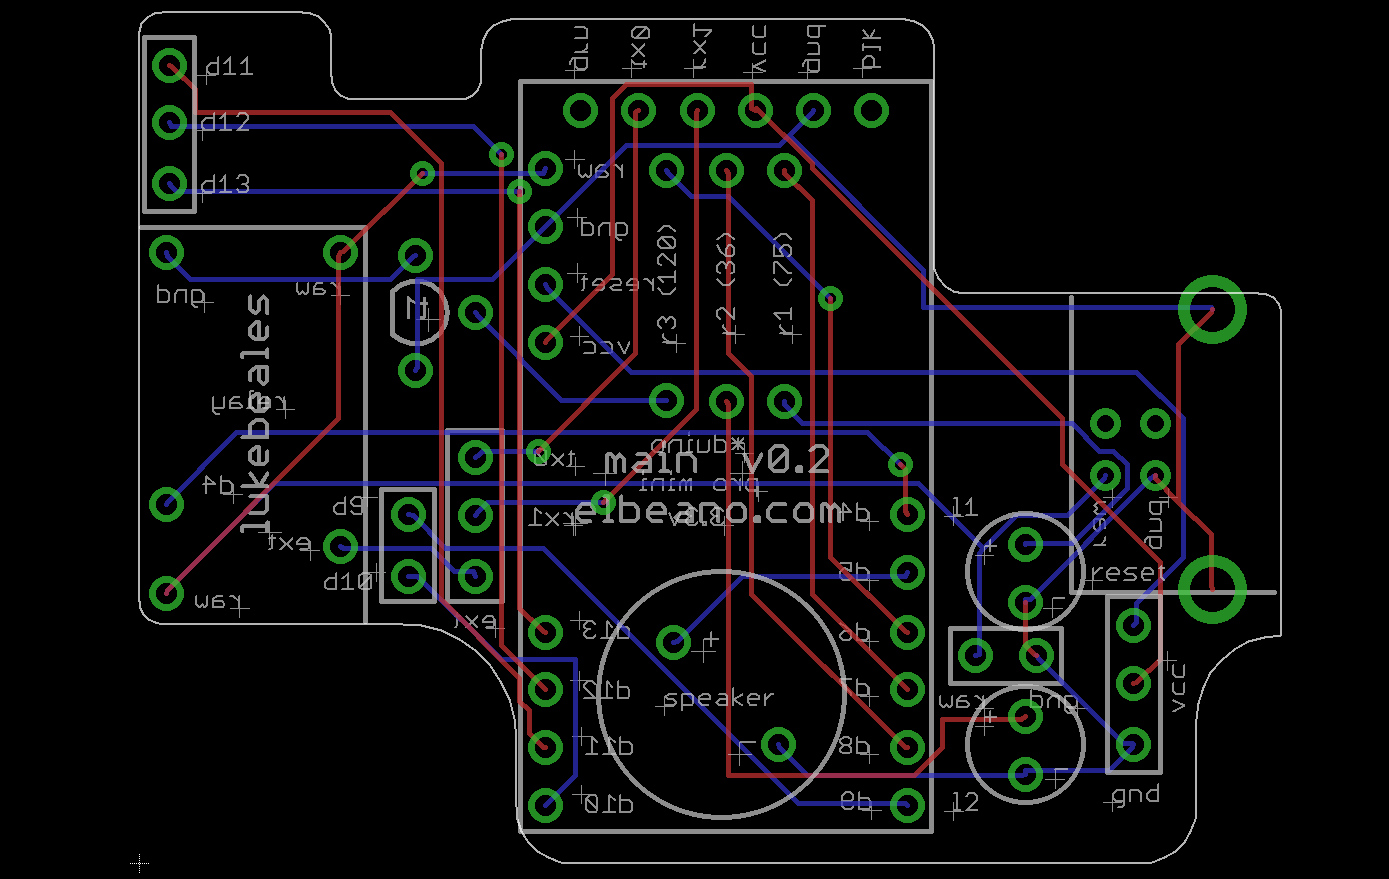
With it looking good for a fitout it was time to see if these could be turned in to actual circuits. I fired up Eagle and started designing where all the traces and holes would be according to the 3d fitout earlier.
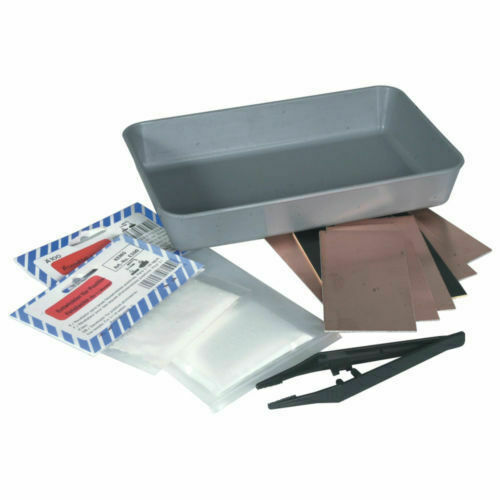
With the circuits looking good, I had been researching copper etching which can be done at home with a standard laser printer and an etching kit similar to this one. That way I could make my own actual boards without having the cost and delay of having proper boards made.
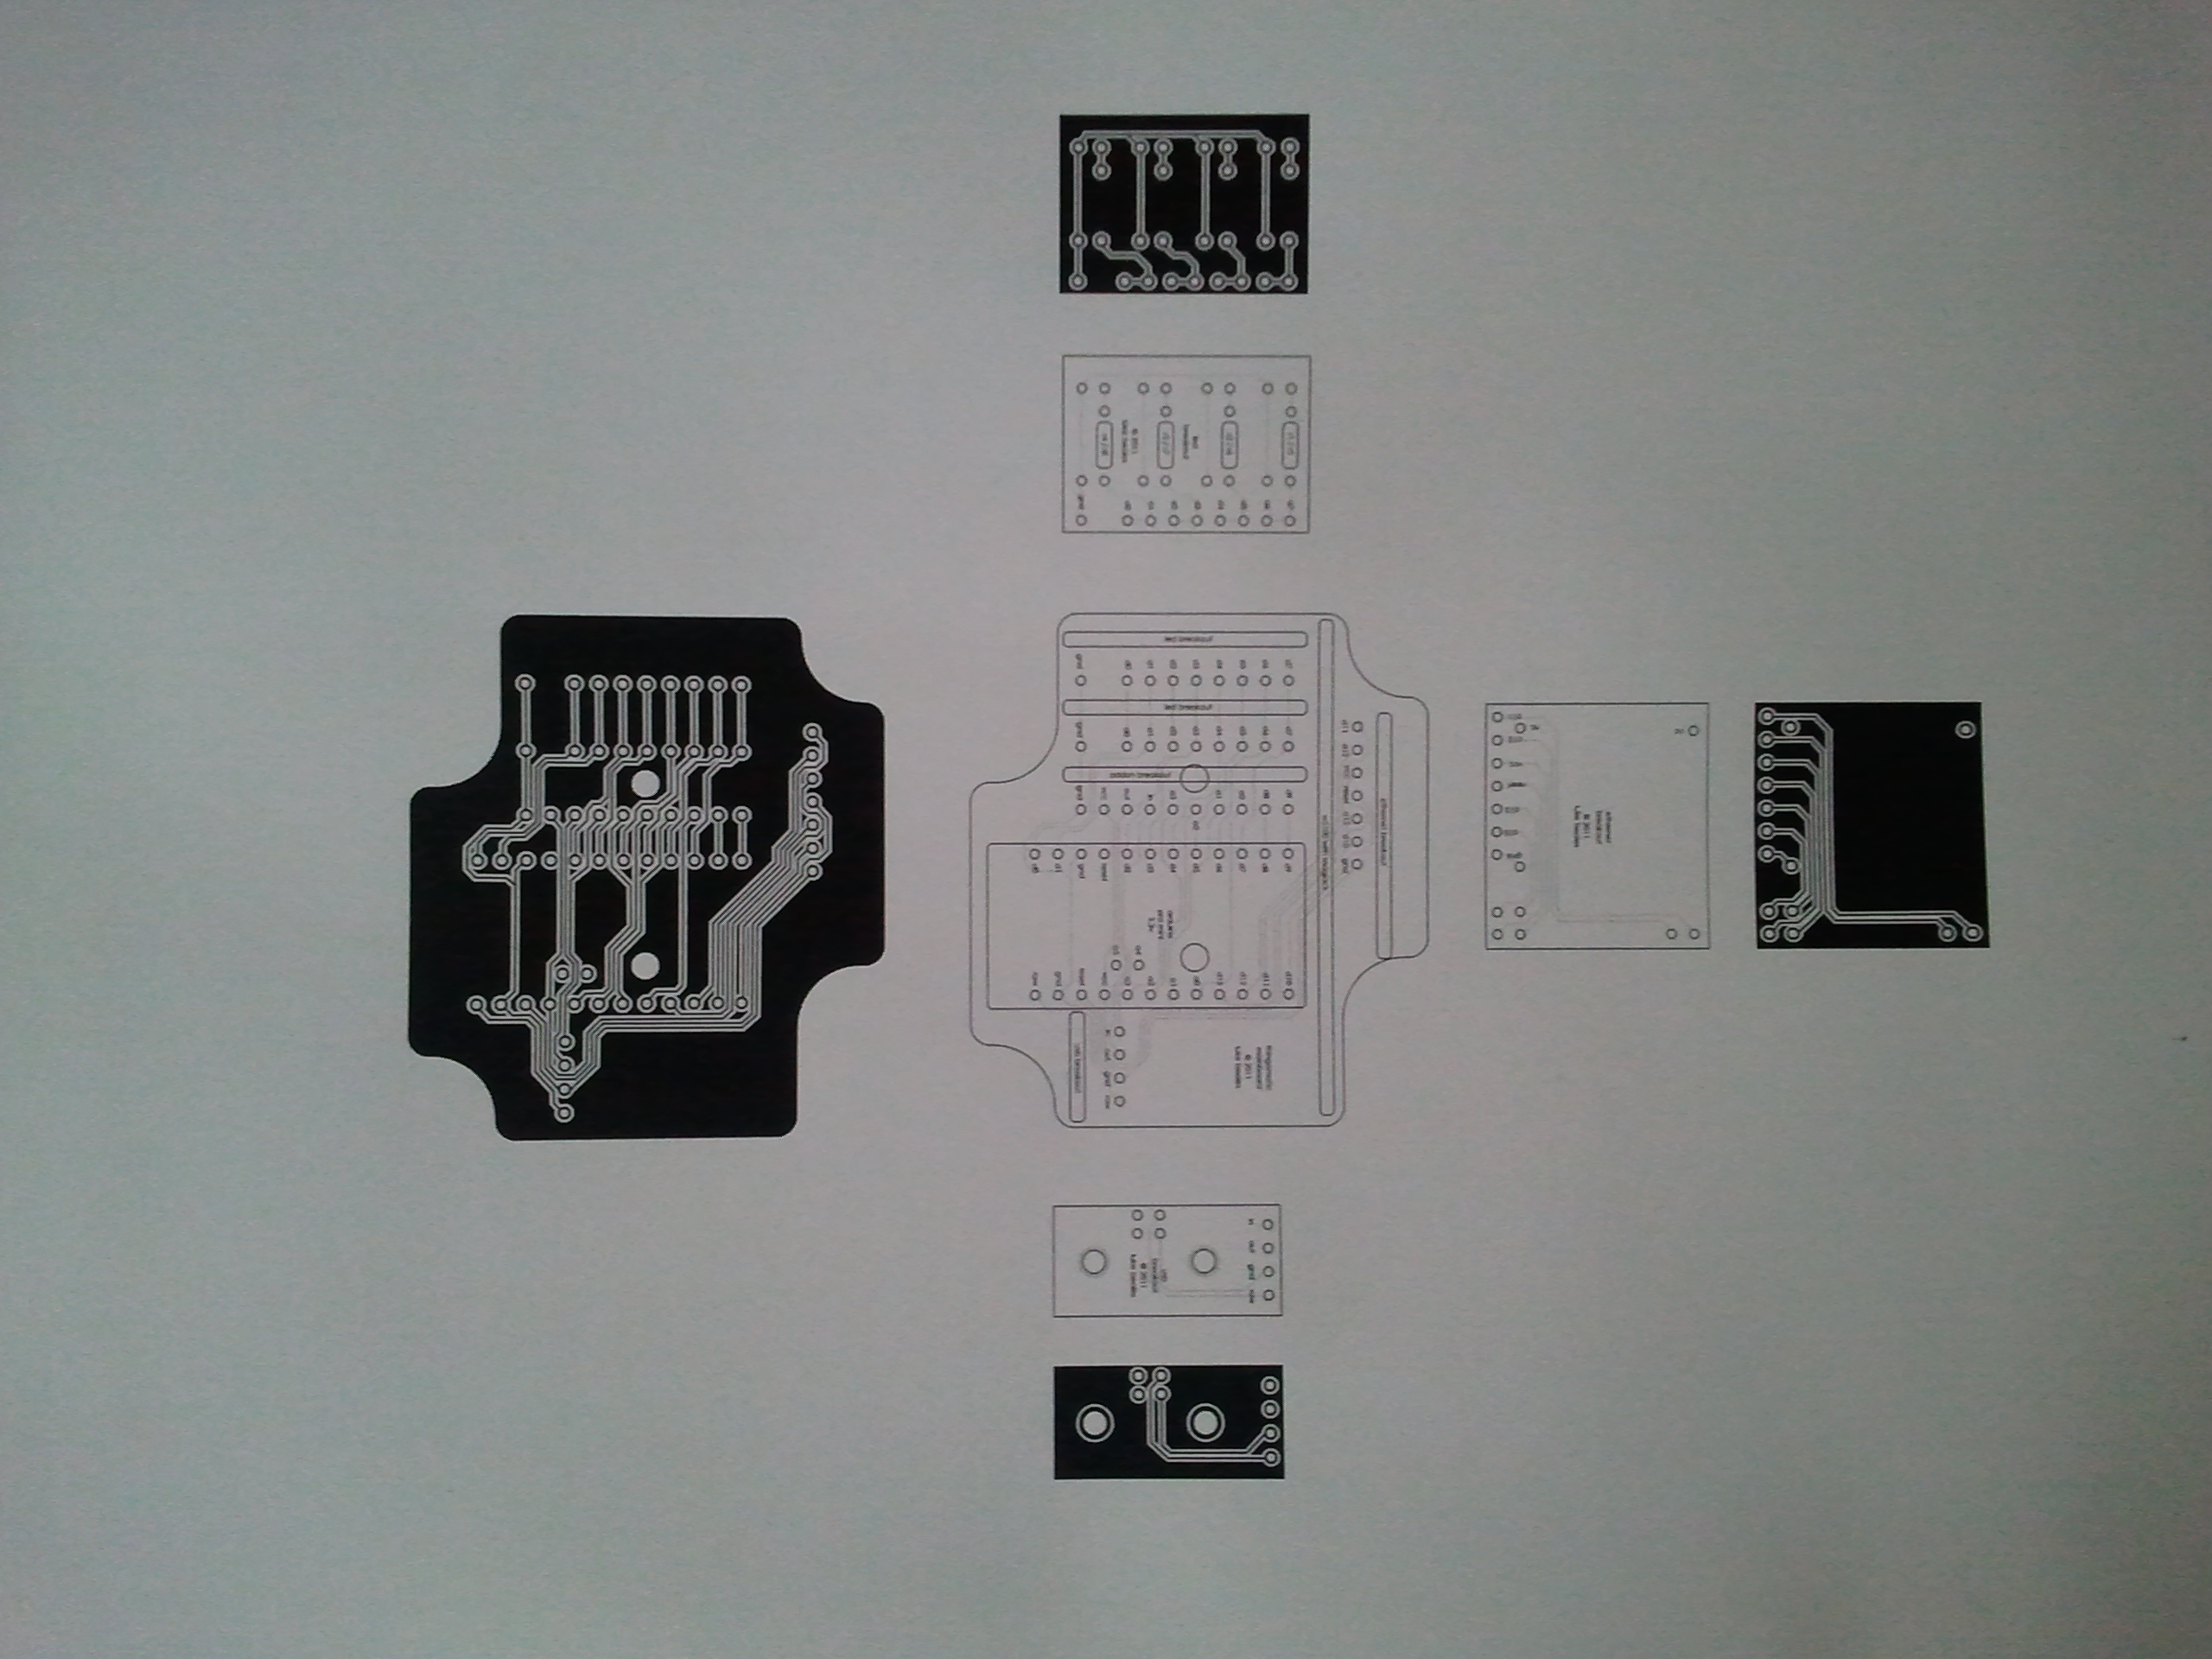
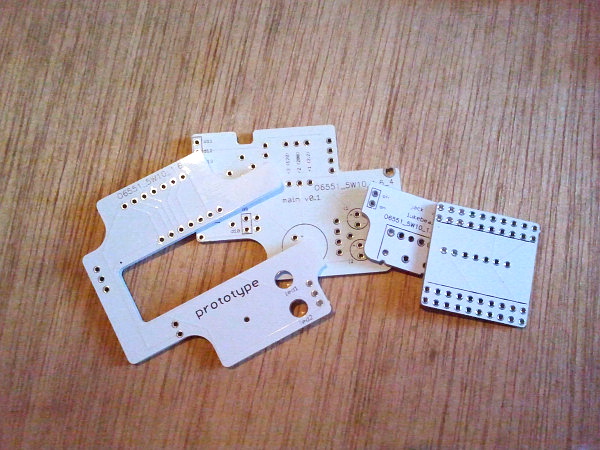
I printed out the circuit boards in an etching friendly manner, ironed them on to a bare copper sheet, and got to etching.

Time to solder components on, drill holes, and see how this would all go.
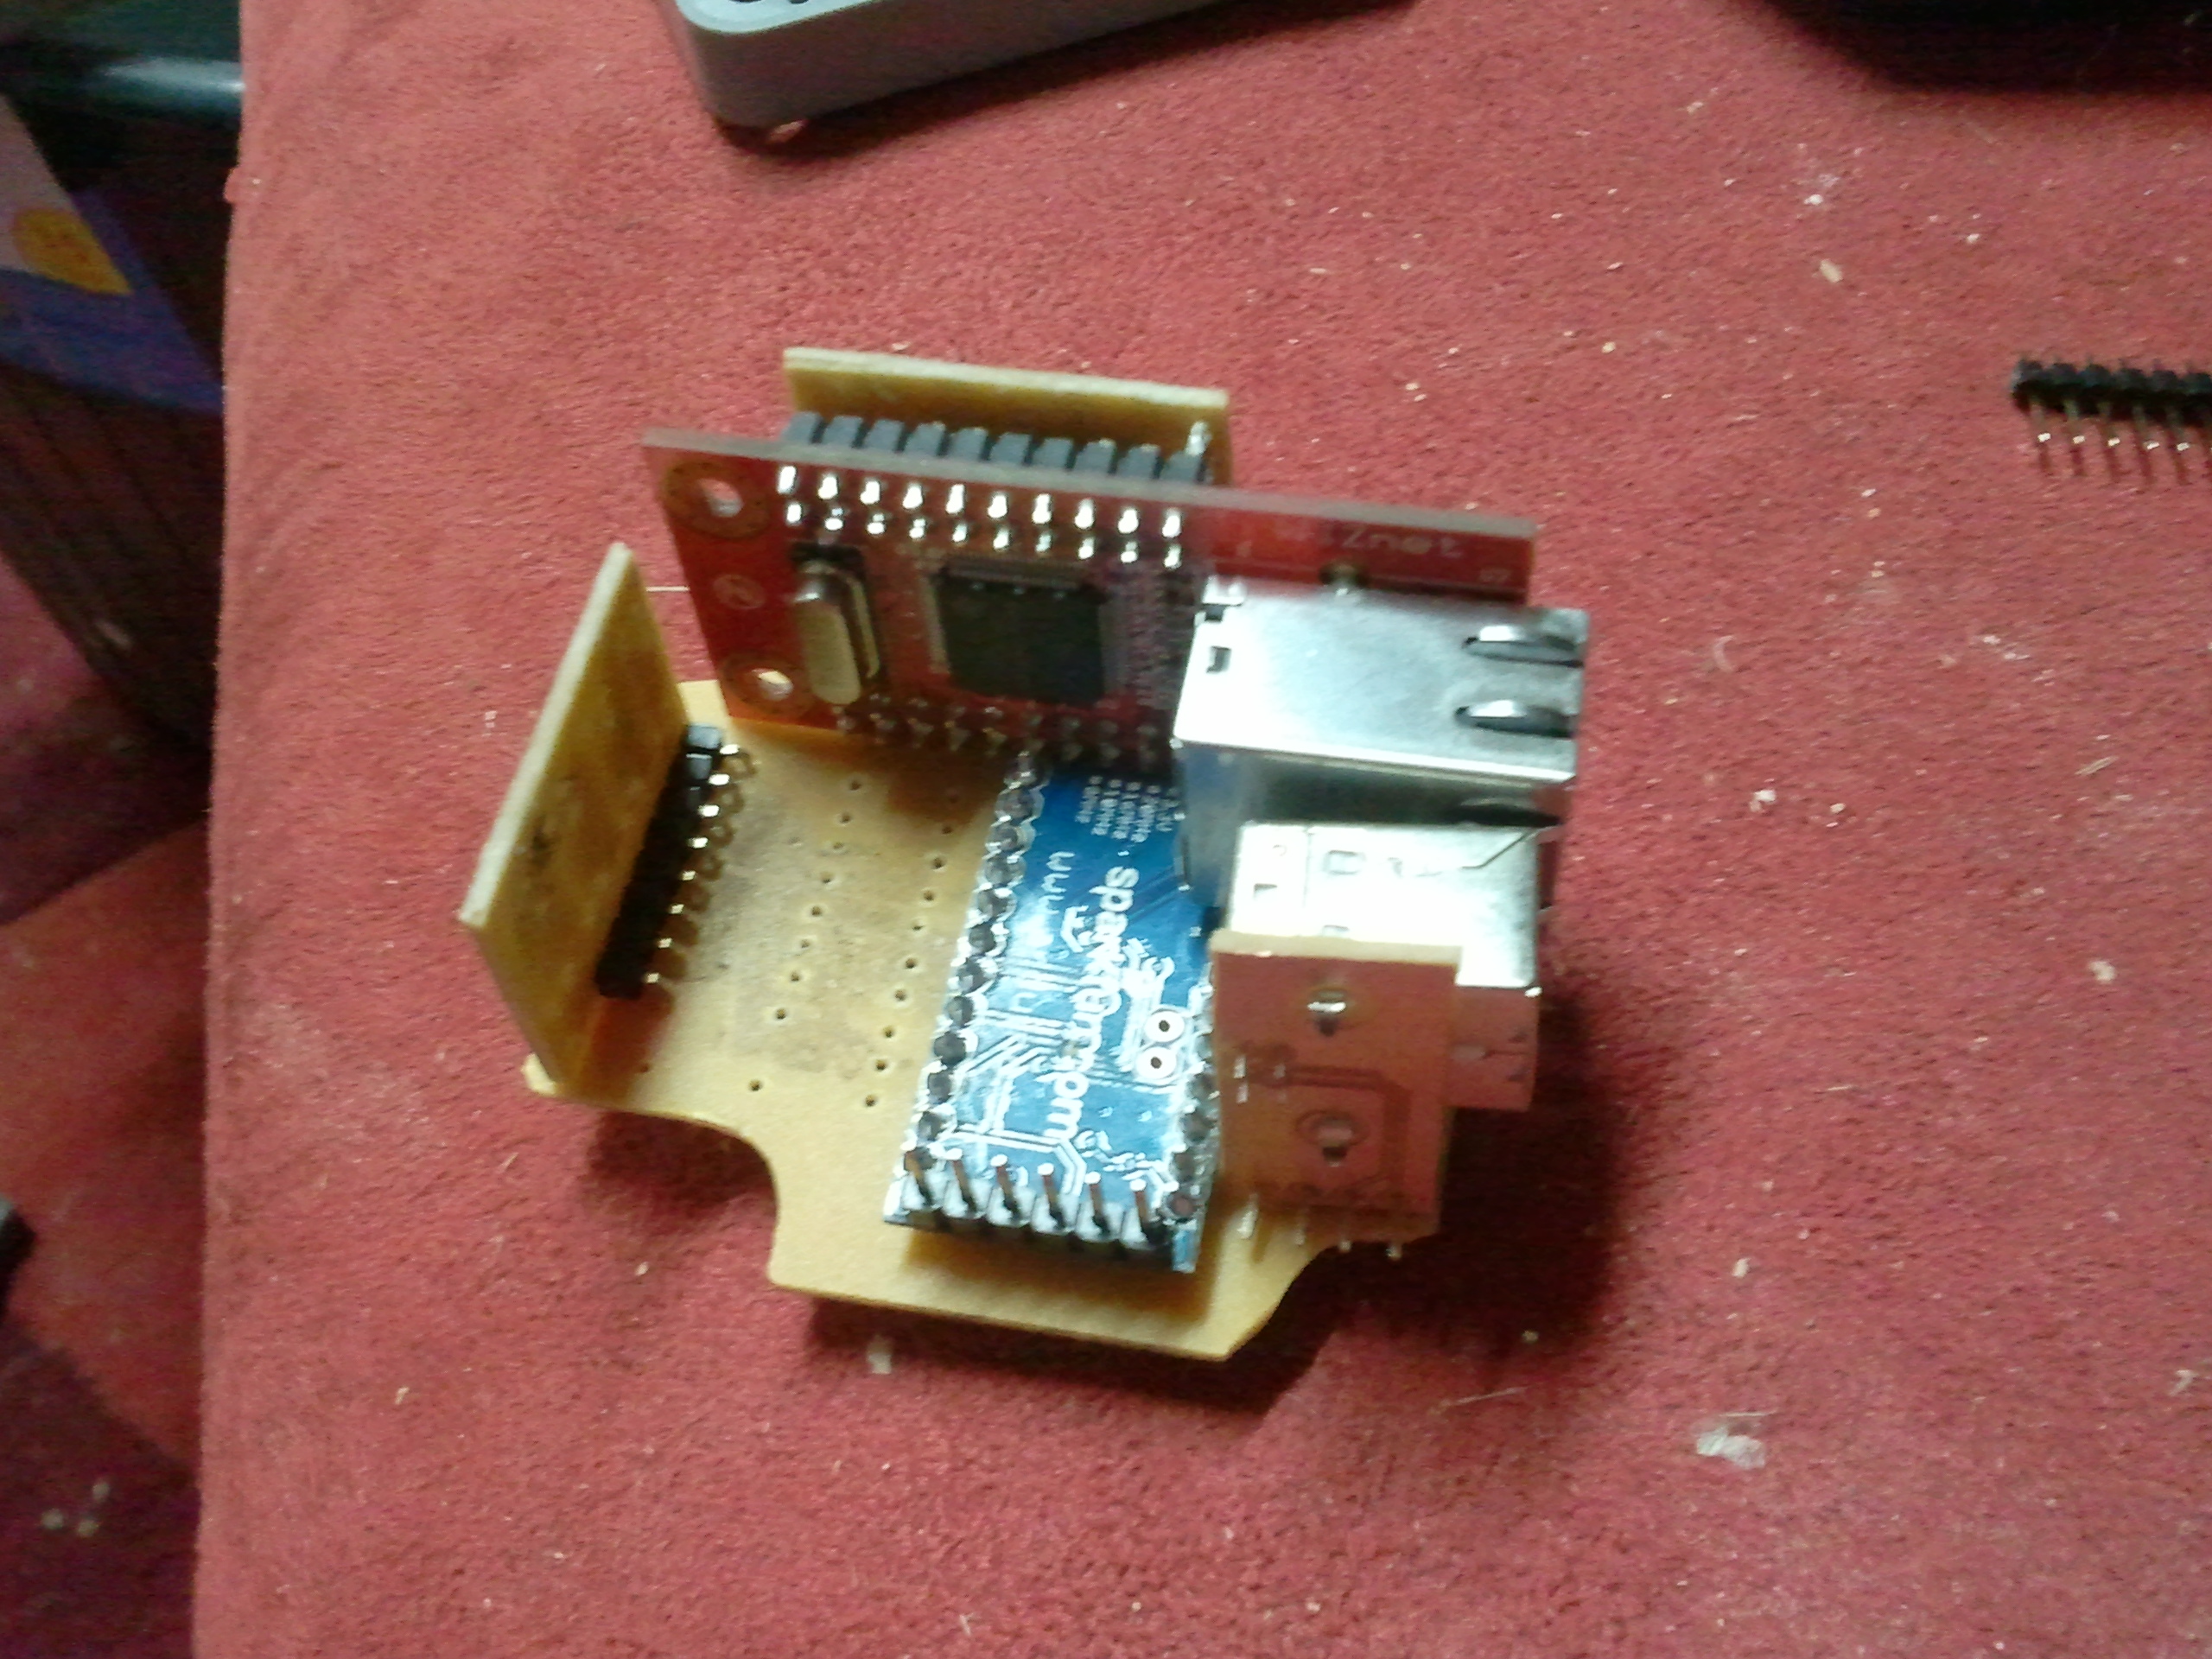
This went through a few revisions to get everything right, holes in the right spot, etc. Once I was happy with the boards I ordered some official boards from itead.cc and played the waiting game.
Official boards
The proper boards arrived and looked great! This was ready for a full assembly to show where any adjustments were required.
After a few adjustments and tight fits I had the correct measurements so I had some more official boards printed up in a nicer colour with all the fixes.
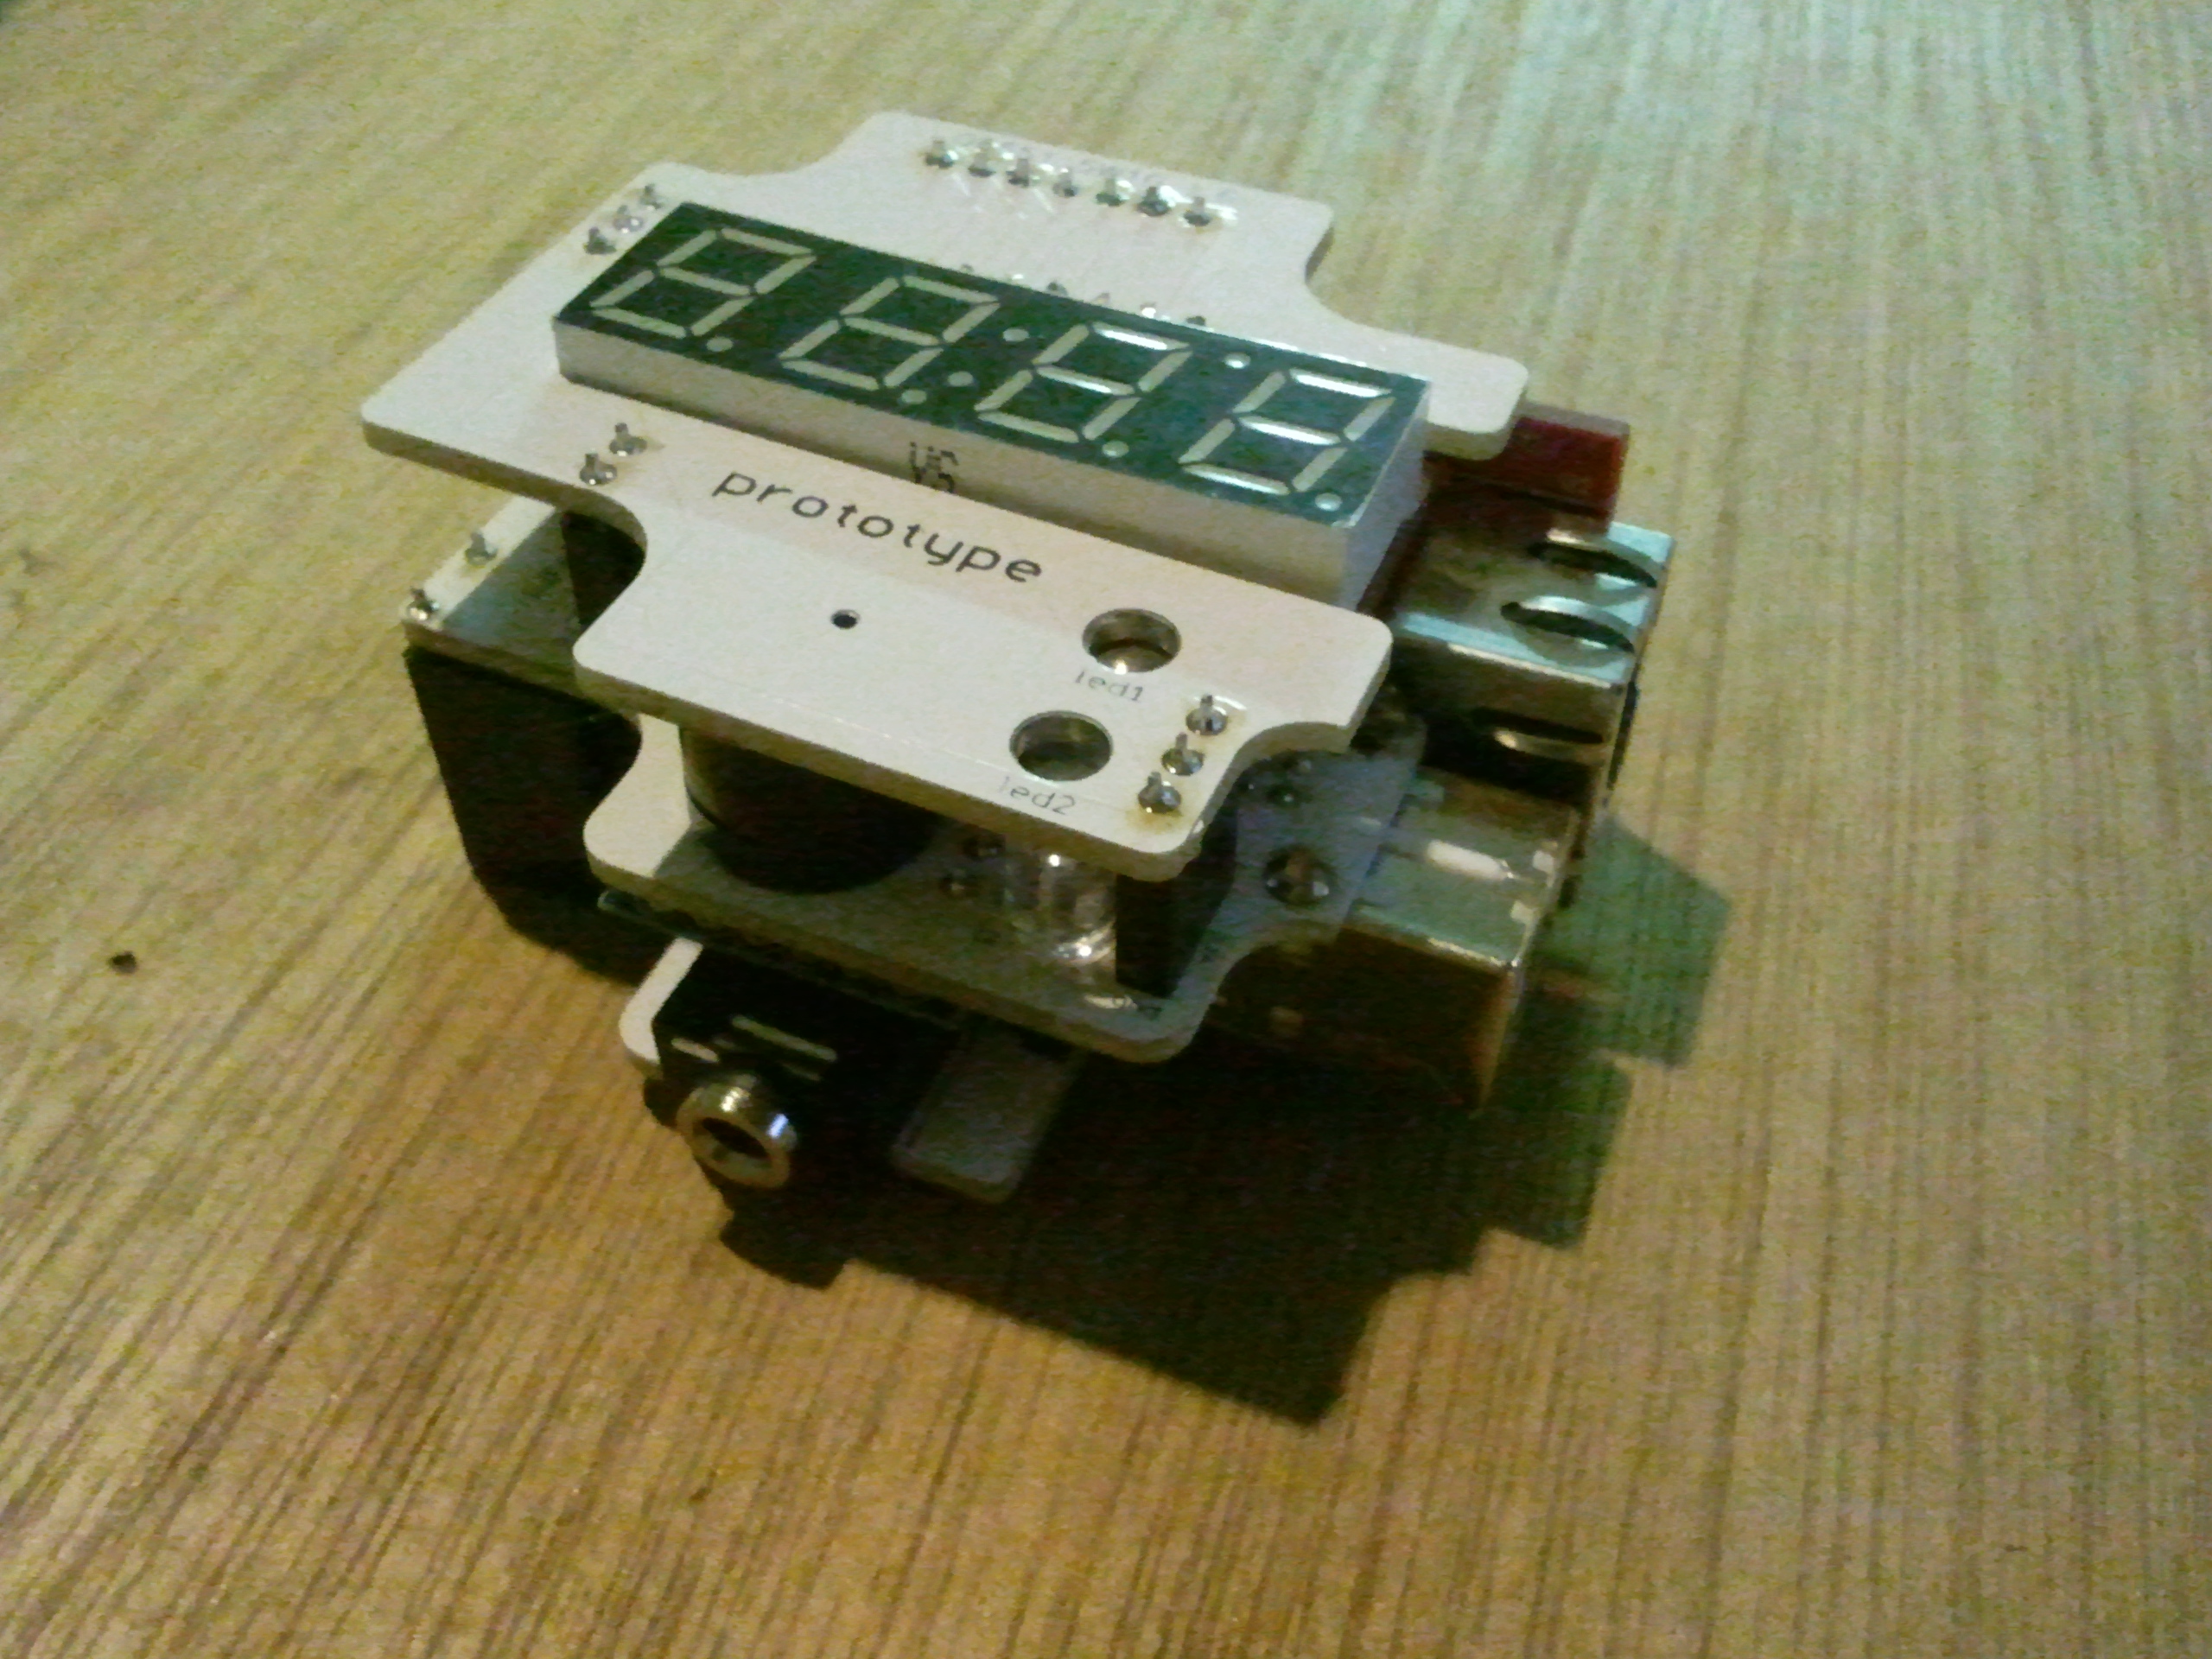
These were then assembled to see if we were on the right track.
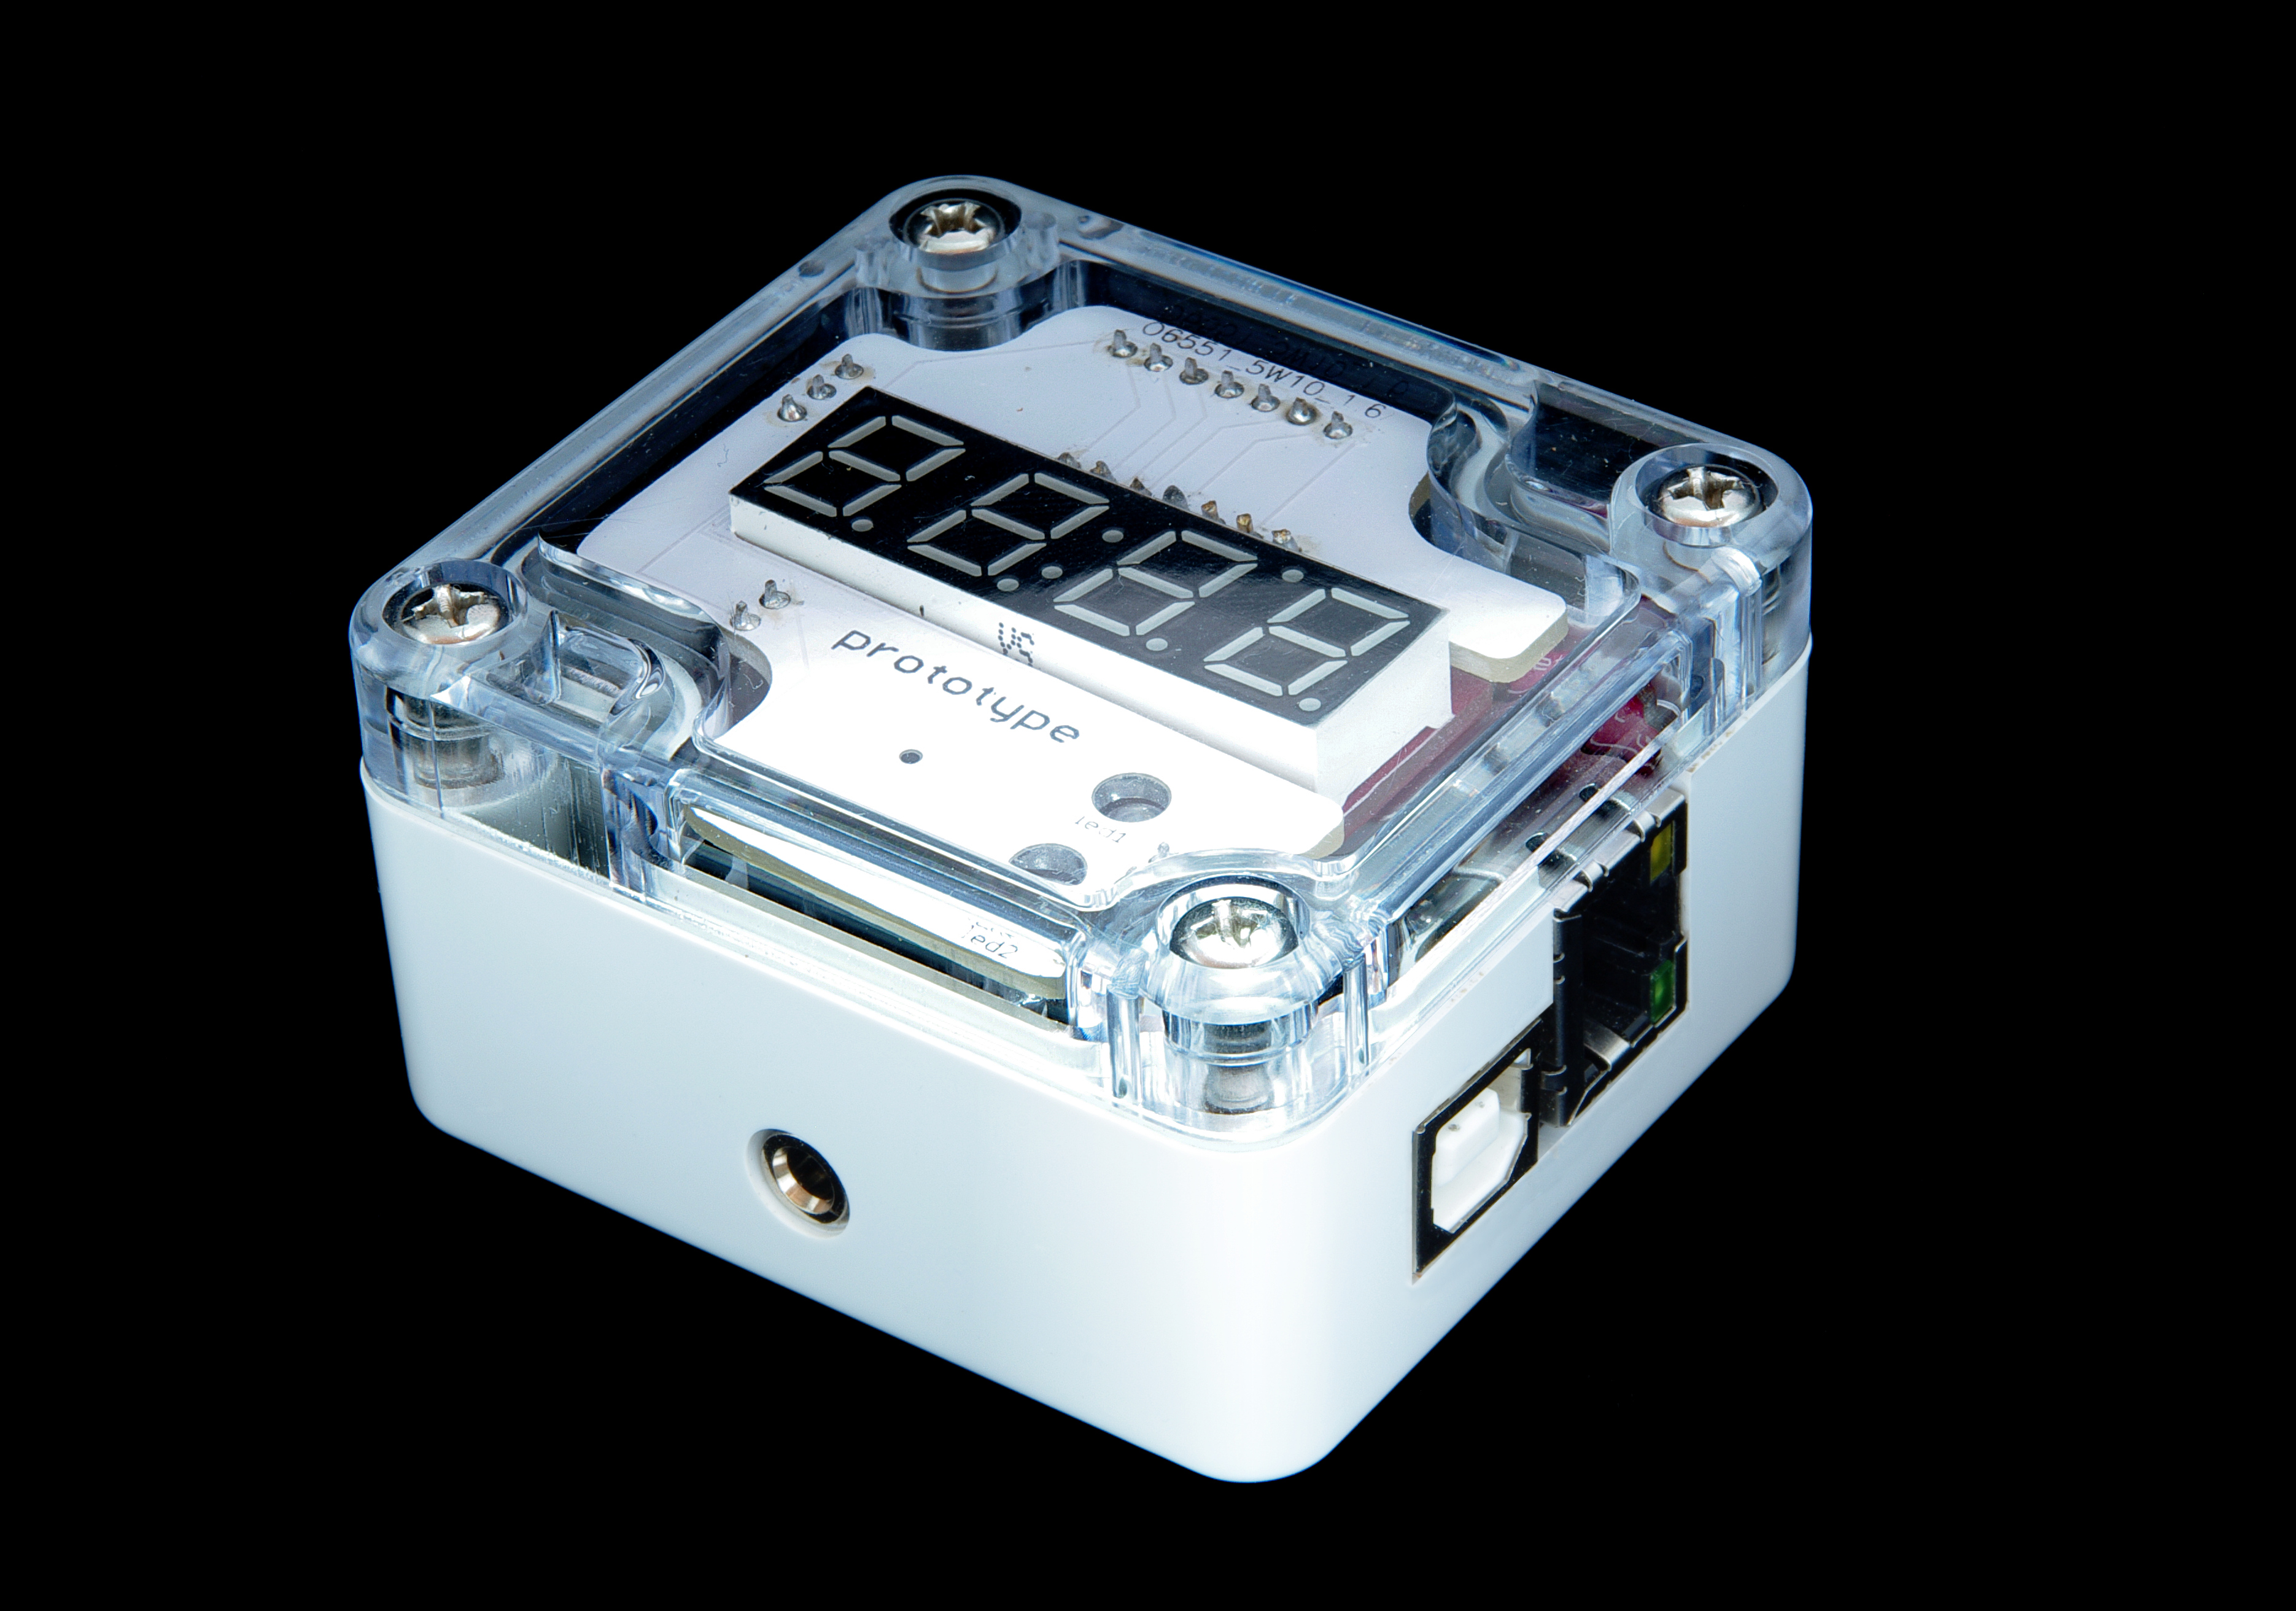
The working prototype
In the end we had a fully working prototype! This also showed some further issues in regards to the square ports. This is as far as the project went for now as it turned out too costly in both time and components, and the web based CMS required a lot more work. But it proved the concept and that a tiny nice looking device could be made.