This content is incomplete and may be inaccurate, feel free to look around & please check back later for updates.
I’ve been working on getting a good camping setup that is the least annoying, all while taking my dog along as the passenger. This makes space tight so I’m looking at adding a luggage rack to move the tent out of the boot.
For those with an NC 2006-2015 model you’ll find there’s any number of racks for the NA, NB, and ND. For the NC it wasn’t the most popular model at the time, and it’s been out of production since 2016 which are the reasons I can come up with to explain the shortage of racks for it – and for the PRHT it’s even harder. There are a few though once you dig far enough so I’ll go through what I have found.
Which Type should I get?
There are 3 types of racks generally available across all the MX-5 / Miata generations – Permanent, Removeable, or the Revo Rack. They all have their pro’s and cons, prices, appearances, sizes, etc. You’ll see the Revo Rack everywhere so let’s start with that.
Revo Rack
This is the most common answer you’ll see online regardless of whether you’re looking for NA, NB, NC, or ND – because it’s temporary, it is easy to attach and detach, it is reliable, and fits pretty much anything. It comes in polished silver or black.
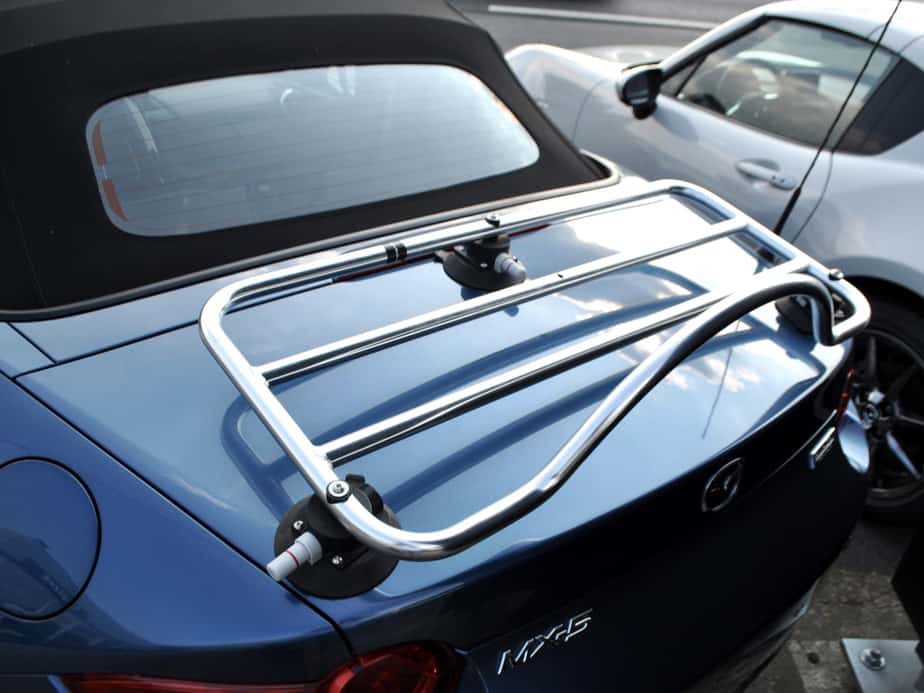
The way it works is it attaches with vacuum cups. Each cup is rated to a large amount of weight so with all 3 it’ll be solid. These are large and flat so they don’t damage the paint, and will easily last through a day without any issues.
Pros:
- Attaches in minutes
- No damage to paint or bodywork
- Holds the same amount as removeable racks
- The most common
- Looks great in silver or black
- Fits pretty much any vehicle (NA, NB, NC, NC PRHT, ND)
- Available in many countries and many retailers.
Cons:
- The cost – it’s the second most expensive rack I found – by a long way.
- The vacuum pads may require re-calibrating during the day (the instructions say to remove the rack each night)
- The pads detract from the look, and the tube is fairly thick and oversized
If you have the money, and odd shaped vehicle, and don’t mind the appearance of it then it’s the one to get. I know that I would constantly worry about it detaching, and the look wasn’t for me, so I ruled it out.
Permanent
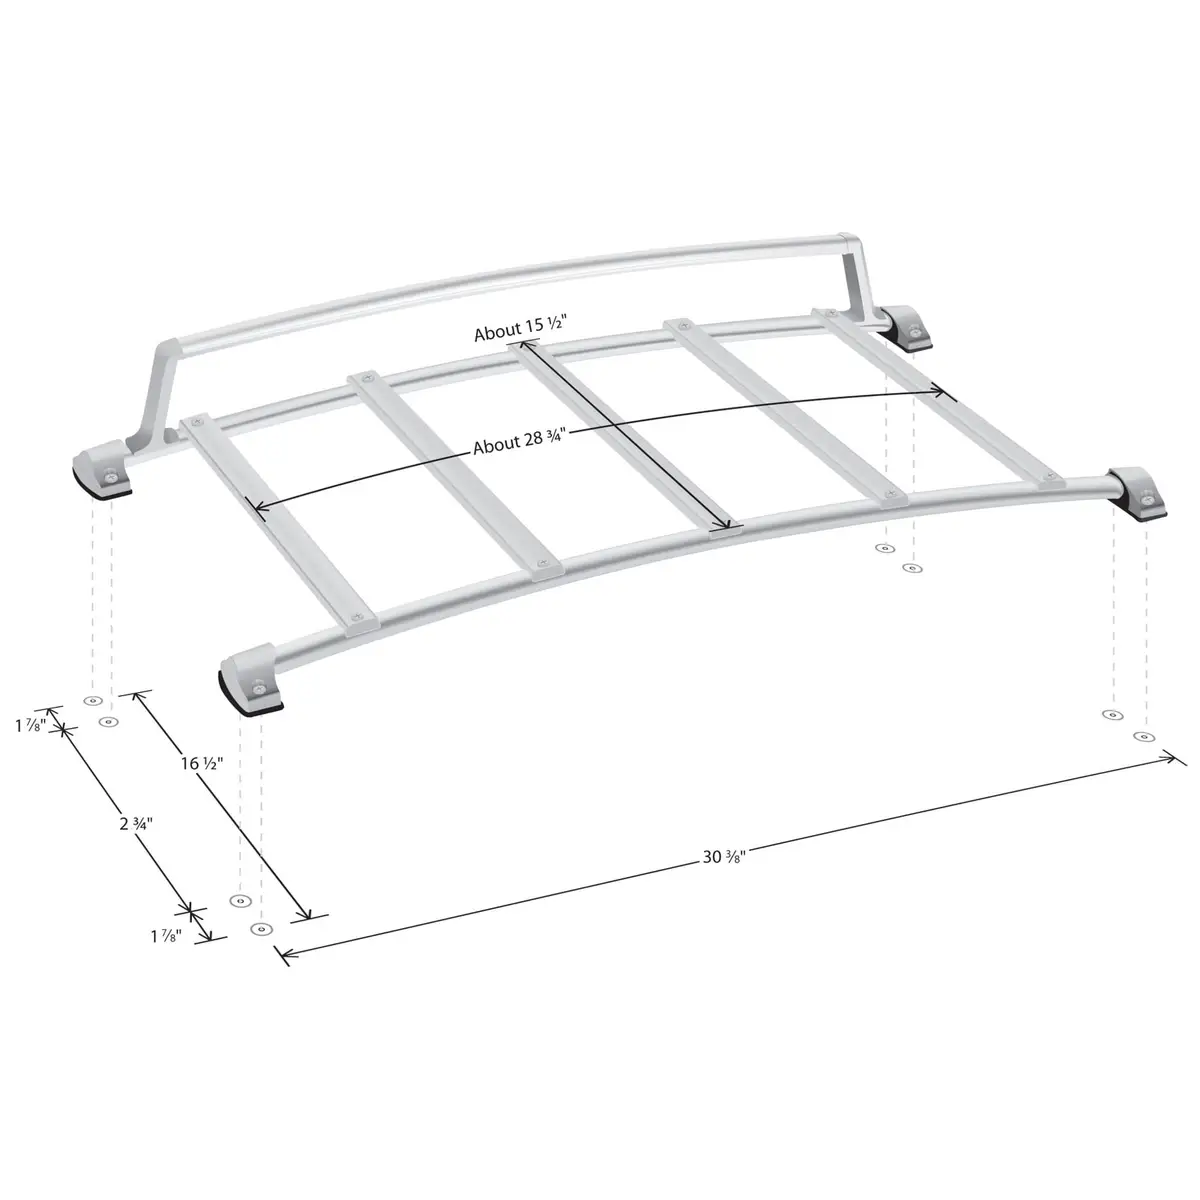
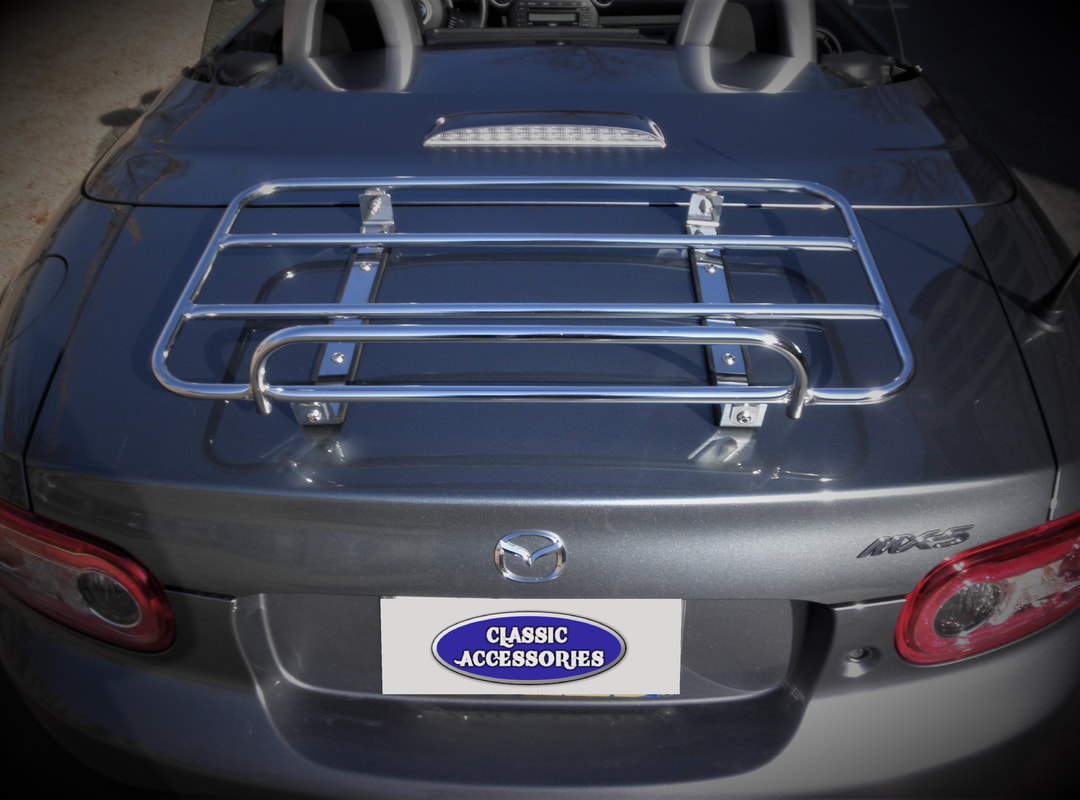
These are the ones that are attached permanently which require drilling through the boot lid. If you have a soft top and a fairly standard or common colour then this is a great option as spares would be plentiful – so you could swap the entire boot lid to remove it if not needed. There’s a number of these and they’re not really restricted to a specific generation, ND’s are a tiny bootlid so they might miss out on the more common ones.
Pros:
- One of the cheapest options
- They look fantastic and usually in classic styles
- Can securely hold much more than the other options, with no real risk of losing your luggage.
Cons:
- Physical holes in the boot lit – you need to make sure it’s there for life.
https://mossmiata.com/244-010-factory-style-luggage-rack
https://www.boot-racks.co.uk/mazda-mx5-rc-prht-hard-top.html
Removeable
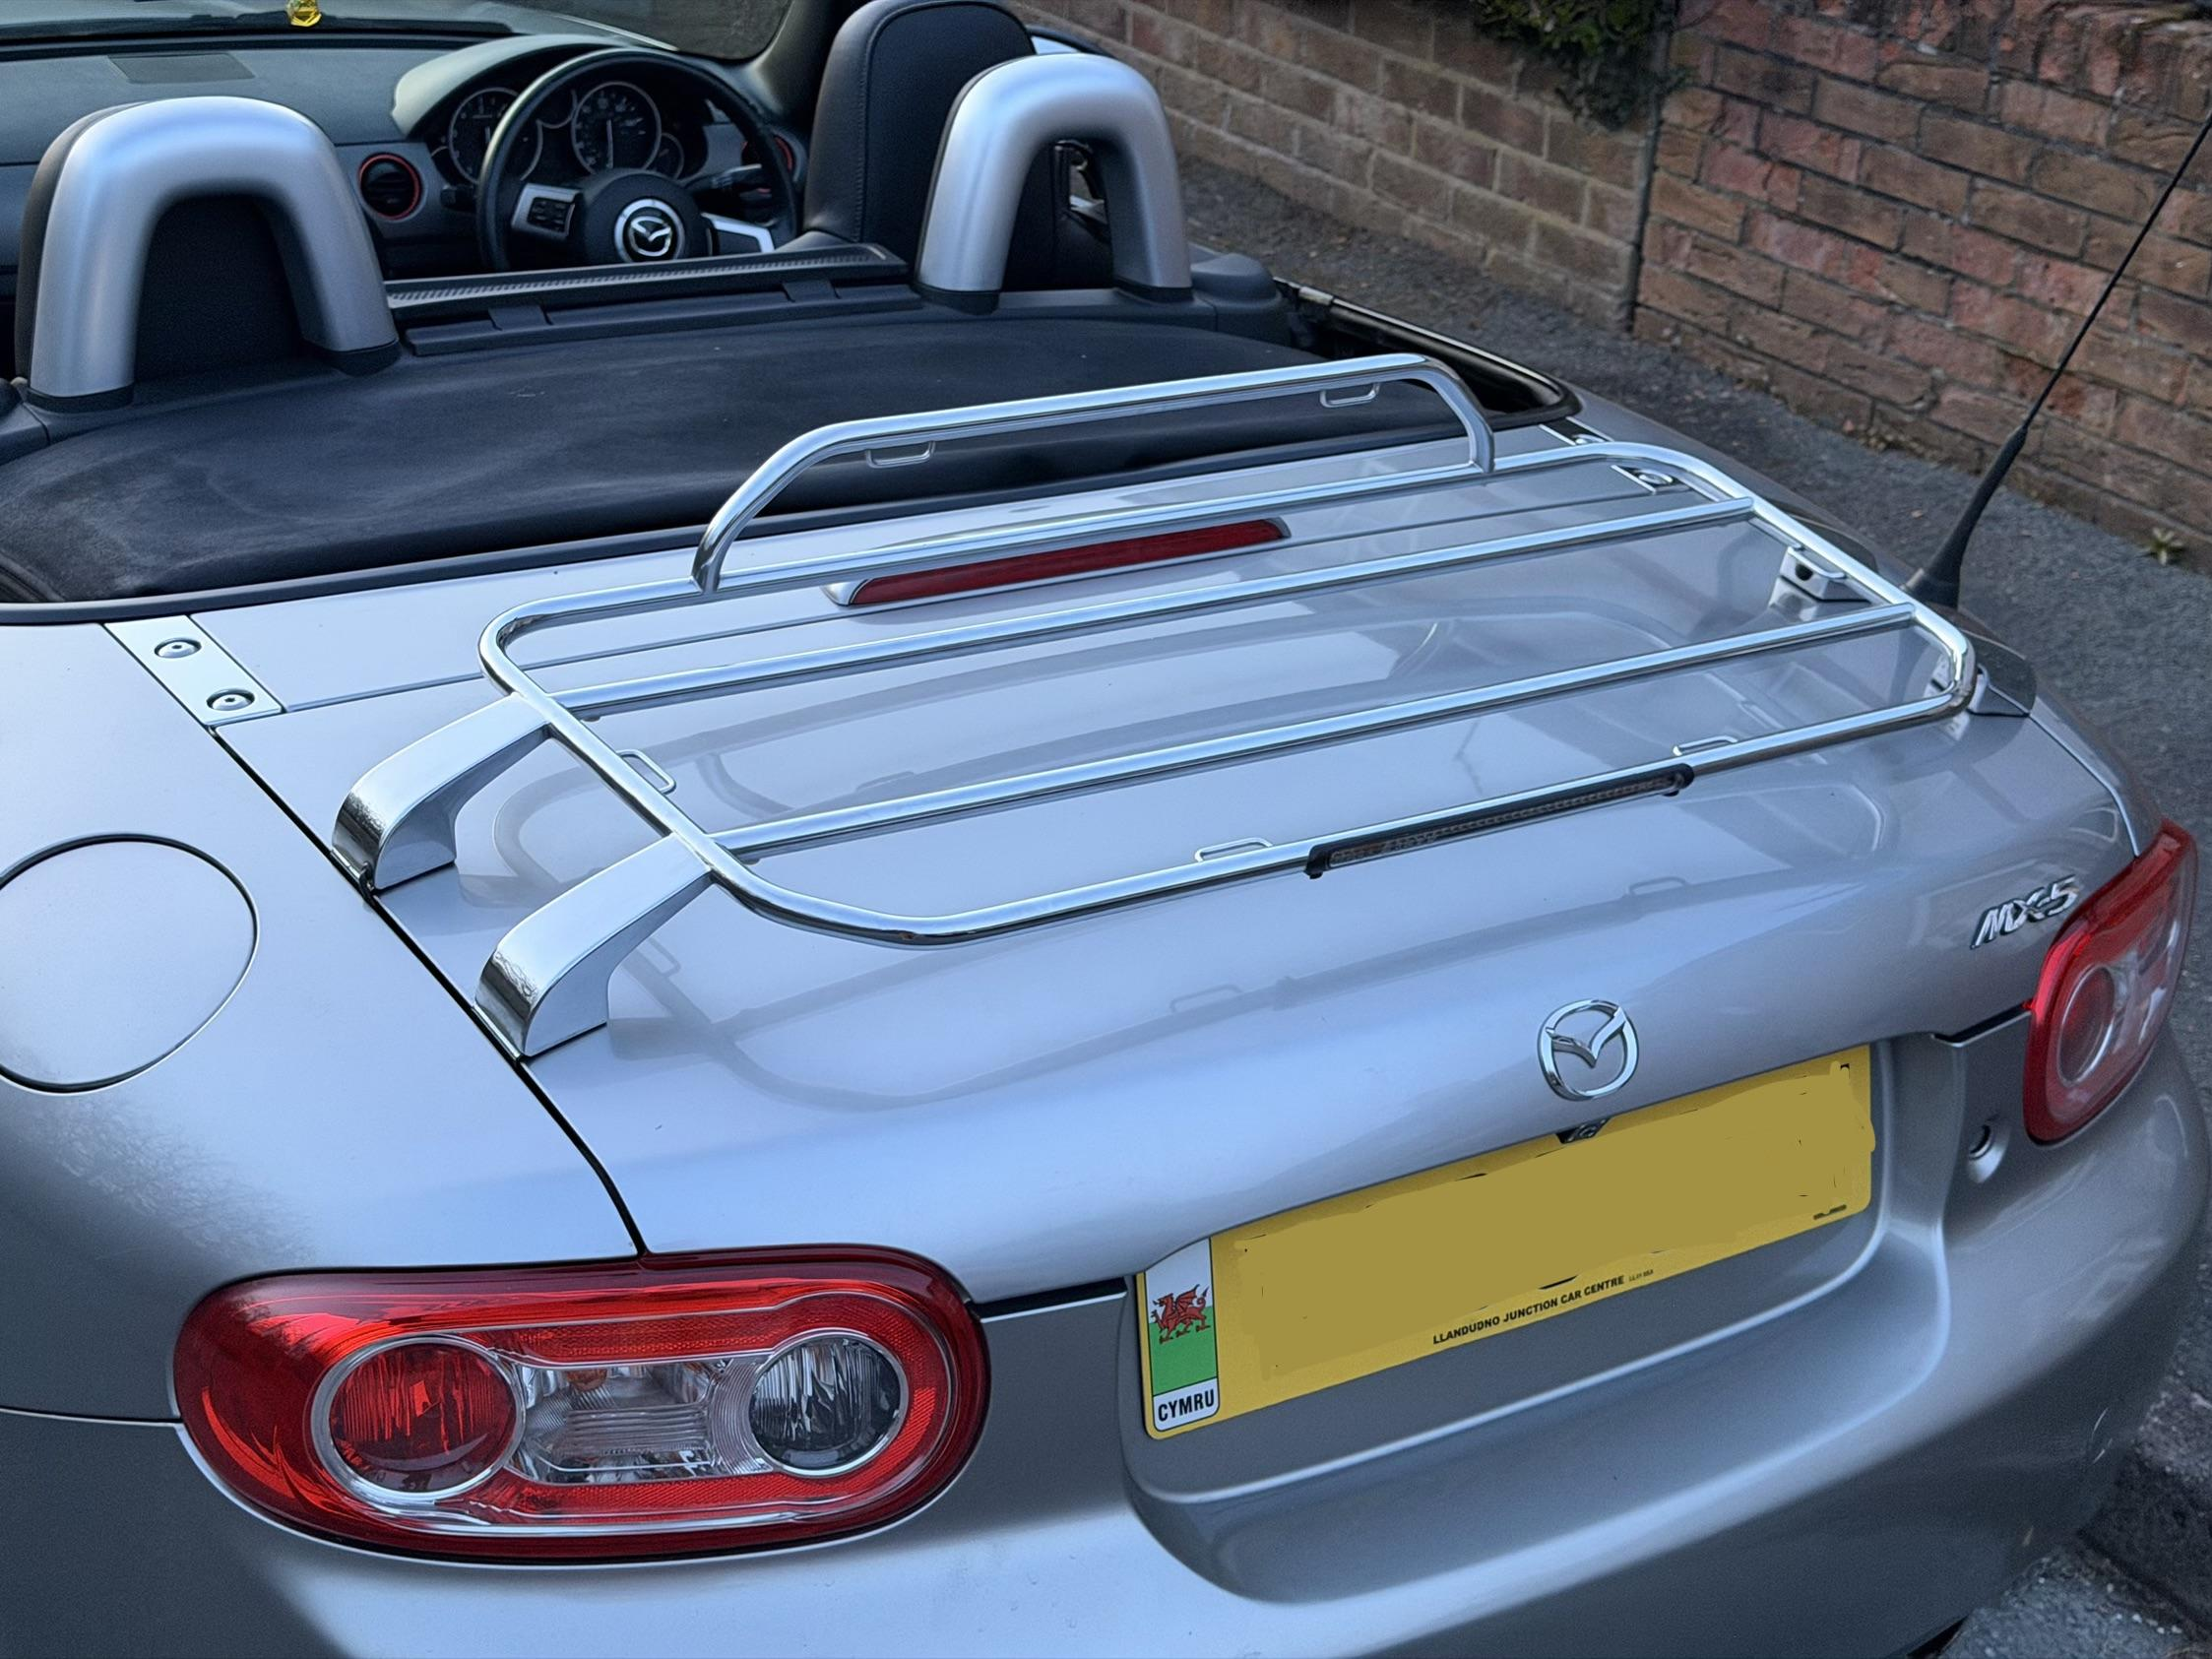
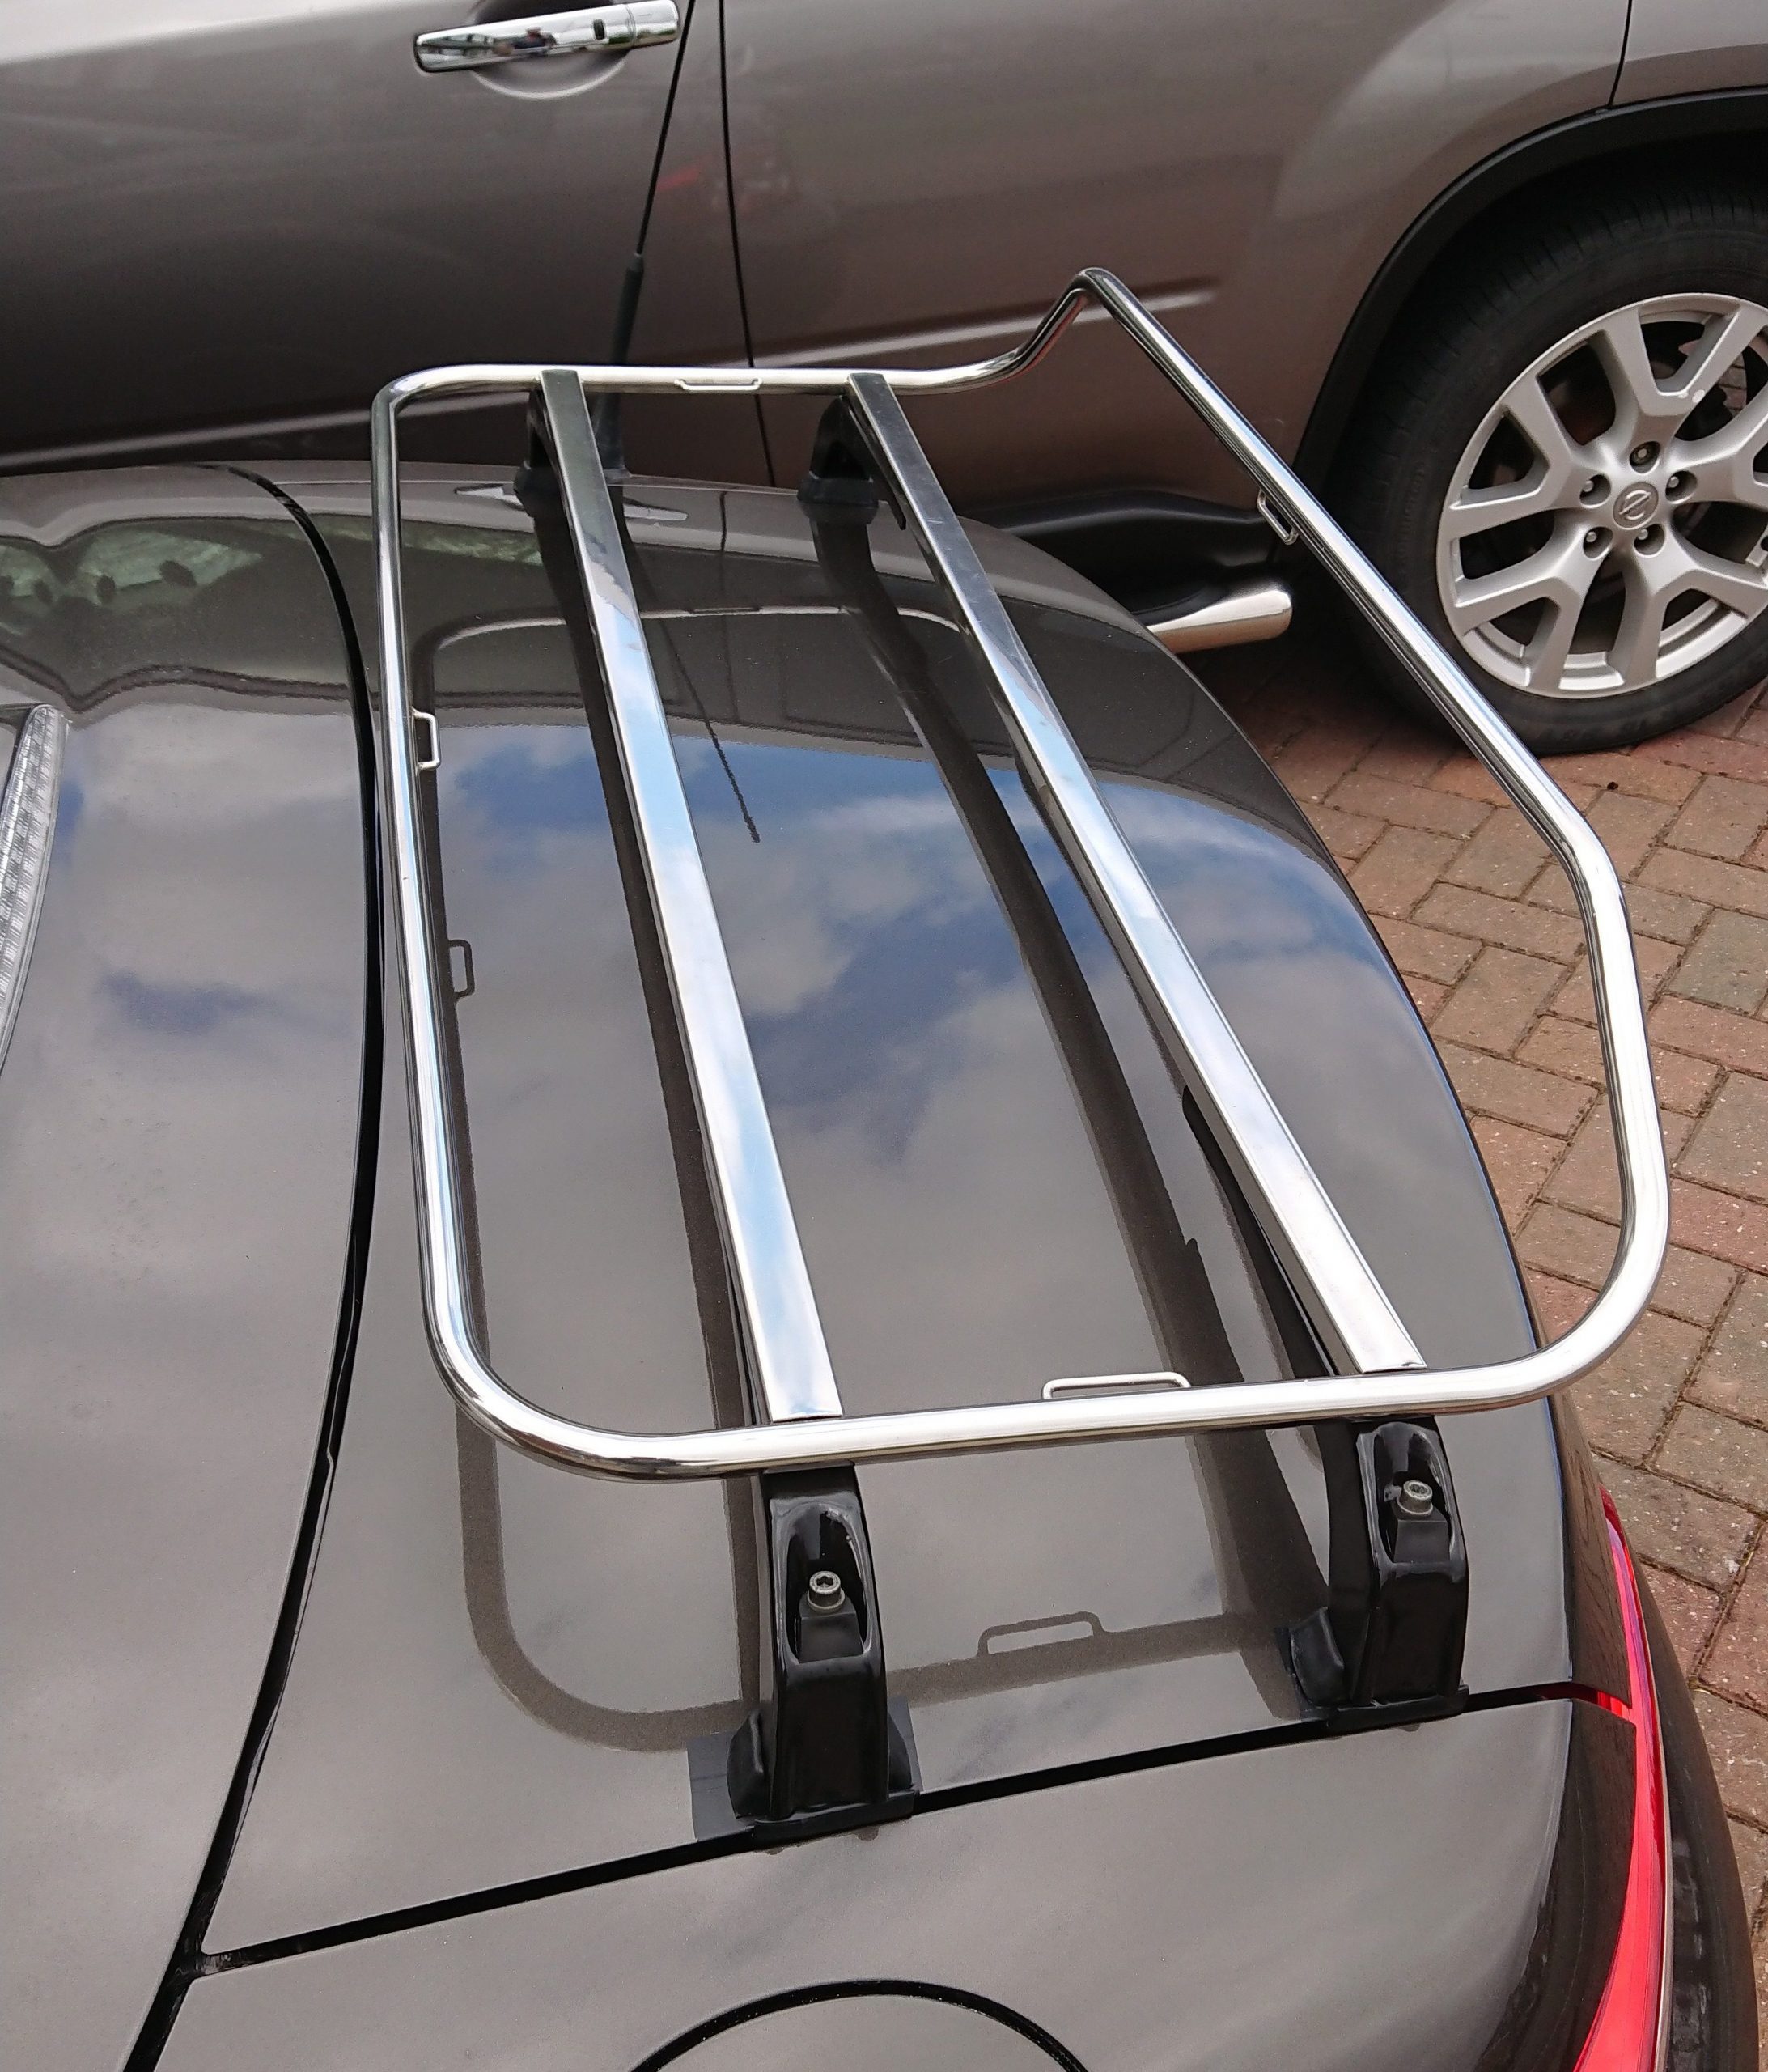
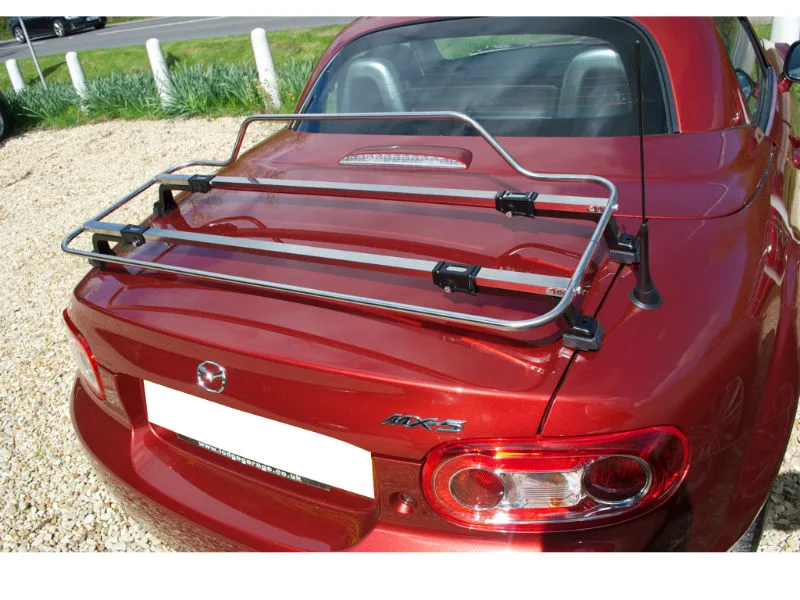
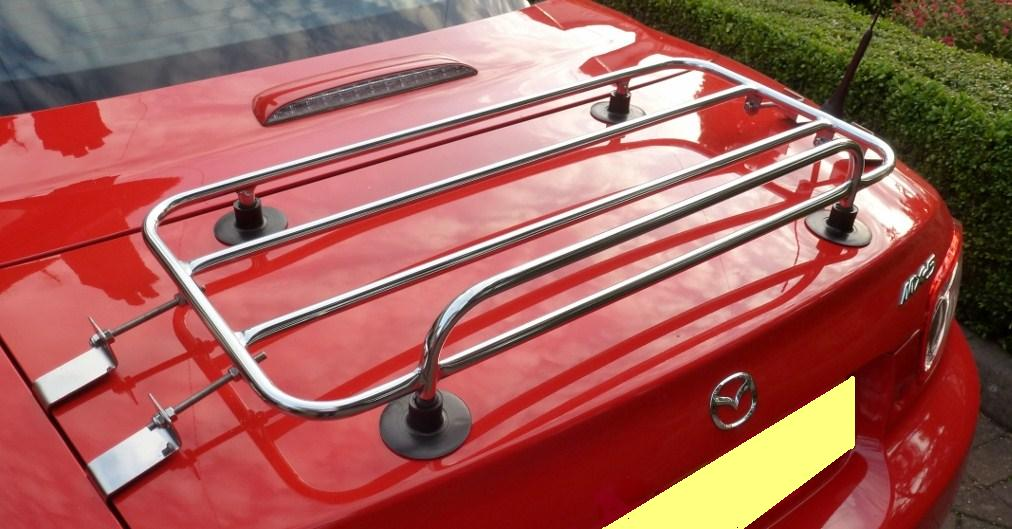
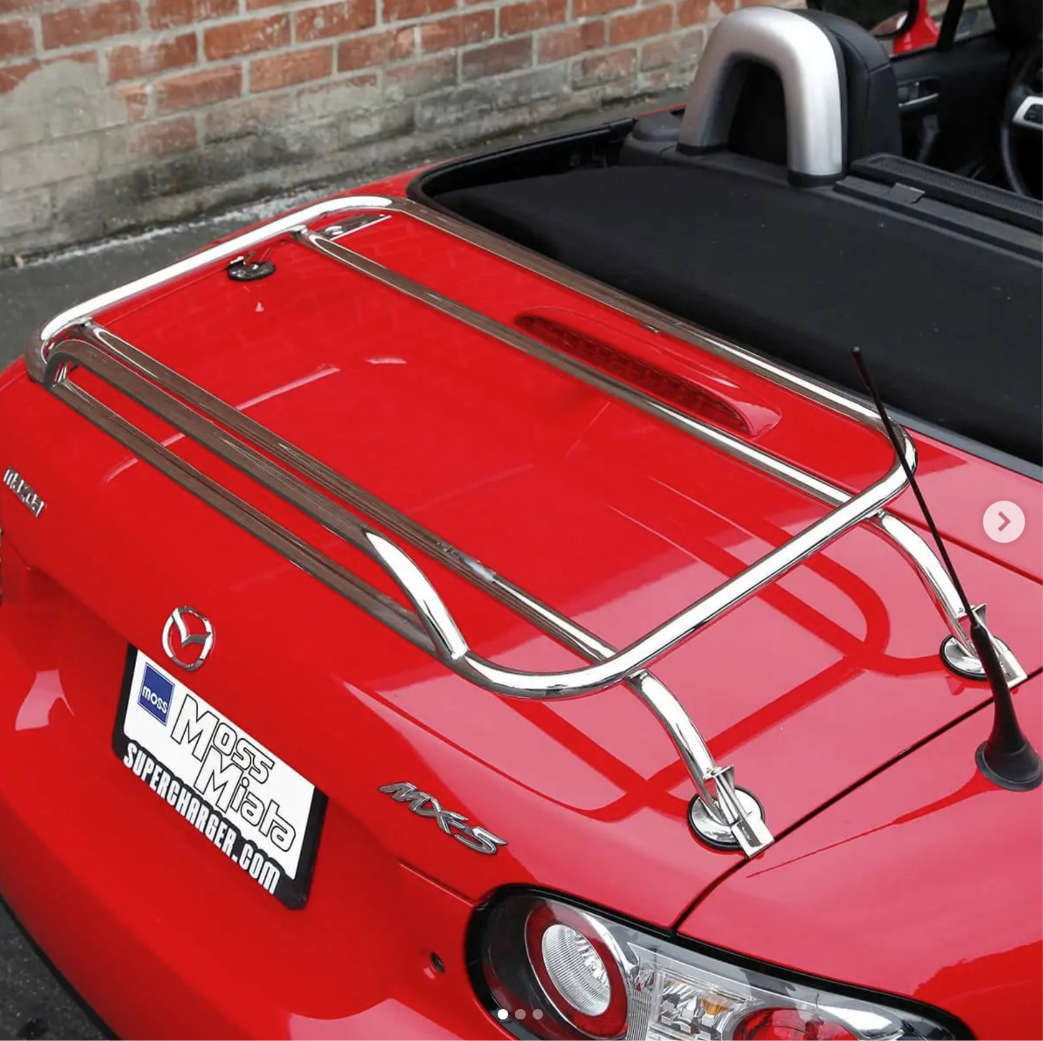
There was actually a genuine luggage rack released by Mazda for the soft top, which is of removeable style. These tend to have a clamp over the edge of the boot lid, using screws to allow the rack to press down on the lid itself. Fairly common, and in the middle of the price brackets. The modern 3rd party variants tend to make the clamps adjustable so they can suit most generations (NA, NB, NC).
Pros:
- Removeable yet secured
- Mid-range cost wise
- Available in a variety of styles
Cons:
- Risk to the paint and panel if not done correctly
- Availability outside of America and Europe is costly – if at all possible.
- Sometimes the look is detracted from the mounts
https://mossmiata.com/901-600-removable-luggage-rack-modern-style-by-tourist-trophy
https://mossmiata.com/901-610-removable-luggage-rack-vintage-style
What about the PRHT?
So there’s a couple of things to know about the NC PRHT which changes the decision. Permanent racks are fine as long as the dimensions are good. Revo rack is fine as most people use these. Removable racks are where the issues come in…
- The boot lid is physically different to the soft top. The PRHT lid is steel, the soft top is aluminium. Also the dimensions are different – both lids start same width, but the soft top tapers more than the PRHT where there’s a 2.5cm difference on each side once it reaches the back of the car. The PRHT lid is also about 4cm deeper/longer. There’s also a curvature difference between the two – the PRHT is flatter. So where a removable rack is made for the soft top and doesn’t have adjustable feet or brackets, it won’t fit a PRHT.
- The roof mechanism – to allow the PRHT to continue to function it needs to clear the front of the rack. Most racks will work (IMPORTANT – WITHOUT LUGGAGE ATTACHED), however if the rack is too deep (or mounted with the raised rail towards the front of the car) it will cause the roof panels to bump into it and fail in a very expensive way.
So if you’re looking for a particular style that is only available in removable, you might need to let it go, or work out how to adjust it to work. The one removable rack that the majority seem to use with success on PRHTs is the Modern Tourist Trophy from Moss Miata (pictured above). If you want a no-nonsense removable option then go for that!
Which luggage rack have I chosen for my PRHT?
For me it’s so expensive to get one in Australia – there is an Australian retailer called mx5mania but the selection isn’t huge and prices are so high – this is fairly typical due to the cost of getting things here in the first place, and we just don’t have the population. I don’t want to damage the boot by drilling holes through, and I know the suckers on the revo rack would have me worrying constantly. So removable it is. And because the price is high right off the bat, I want it to look nice and be worth it even if it takes a bit of work, and the Modern Tourist Trophy just doesn’t quite gel with me, so I have chosen the Vintage Tourist Trophy from Moss Miata.
I believe it’s designed for the soft top as the rear feet are tapered in a little to match the soft top’s boot shape. And it may be too long which will prevent the folding roof cover from operating correctly.
But I think I have solutions for these meaning I’ll get the holy grail – a really nice looking luggage rack for a decent price AND the PRHT will continue to function when it’s on – it just may take a bit of minor DIY adjusting. Let’s see once it arrives.
Update: It has just arrived! Pro-tip: Order it from a European site (in my case Moss Rimmer) as the postage is actually reasonable compared to USA. Initial placement for the PRHT looks ok, about 1-1.5cm spacing from the side edges of the boot lid for all 4 feet. I’ll go in to detail below as there’s a few large issues that prevent this from working on a PRHT.
Initial fitting
This is how the Tourist Trophy/Surco Vintage sits on a PRHT straight out of the box. The squares are just foam offcuts so I can put it in place.
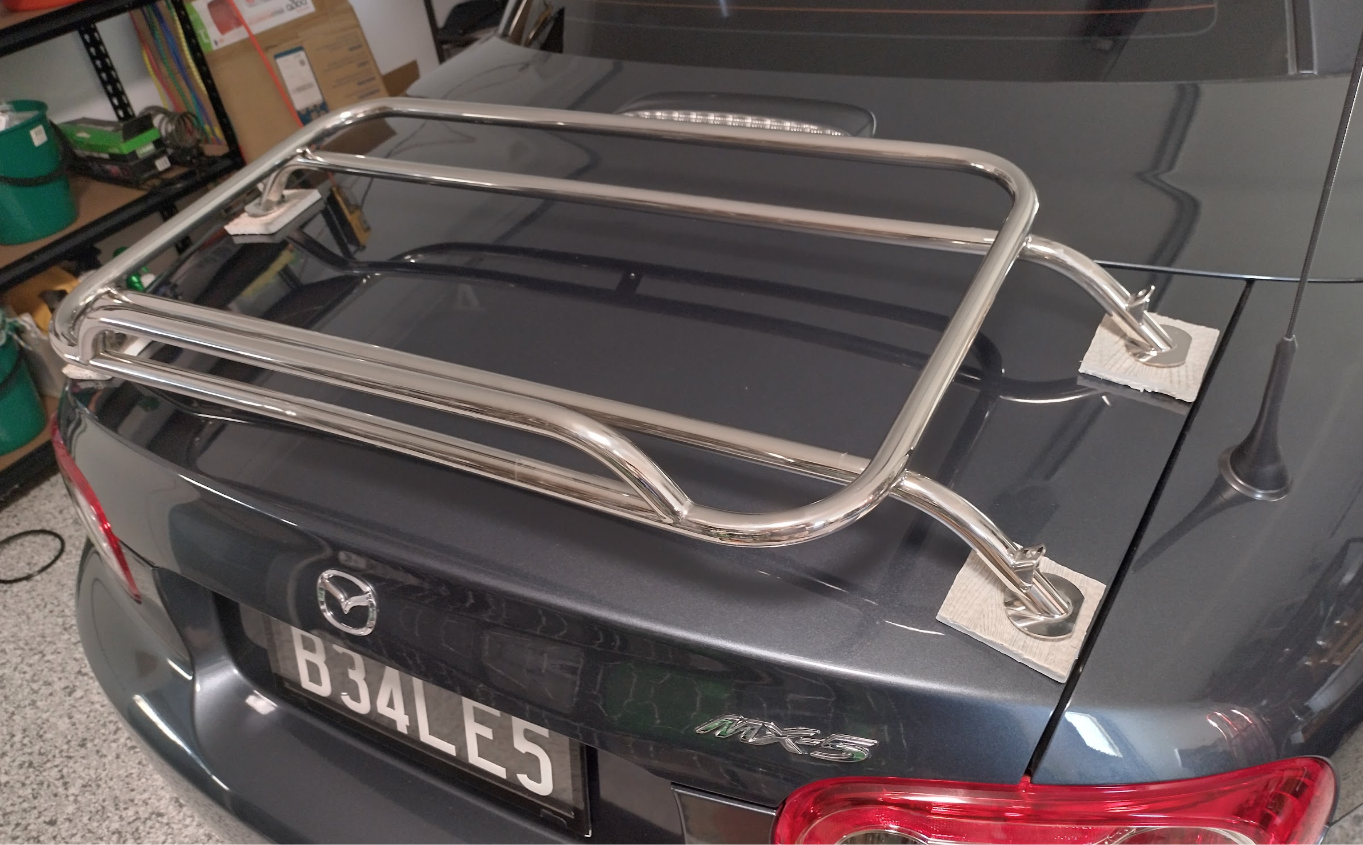
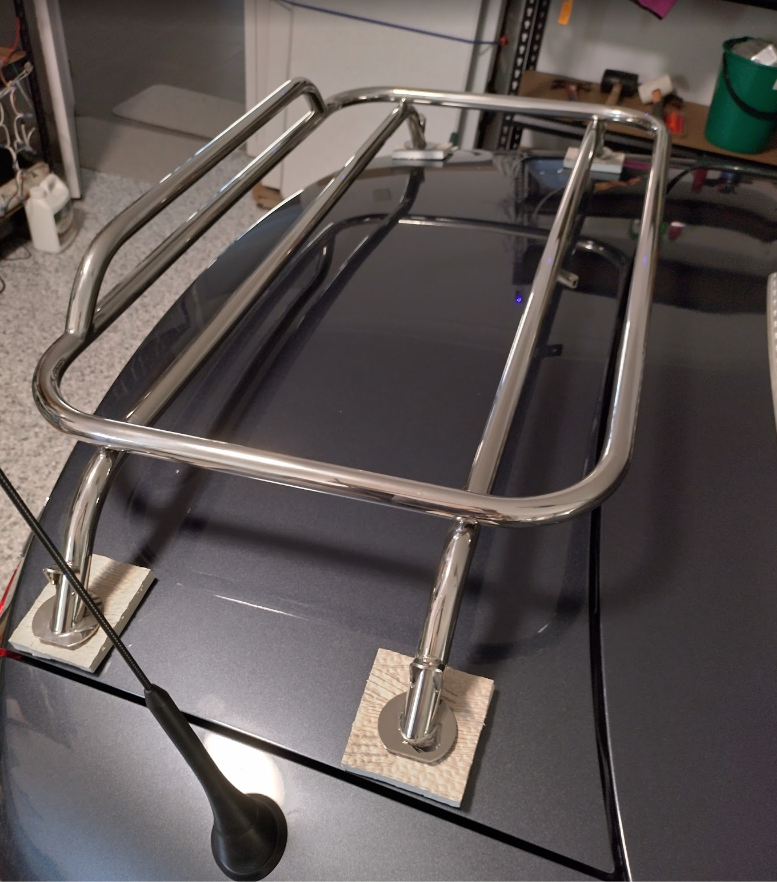
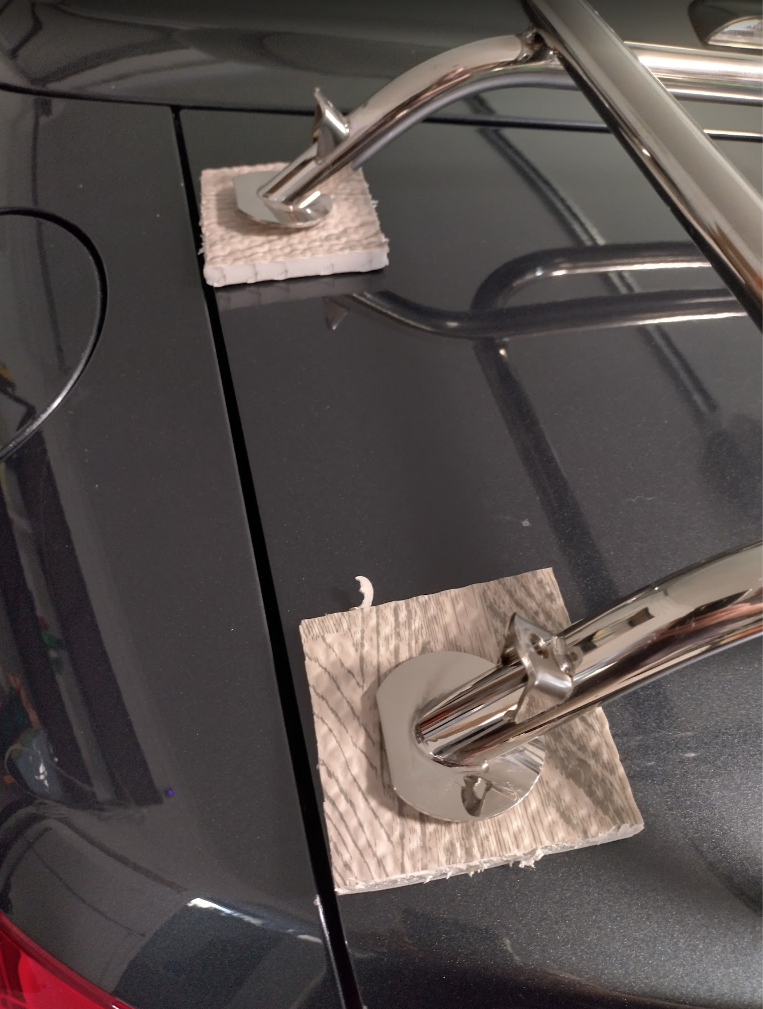
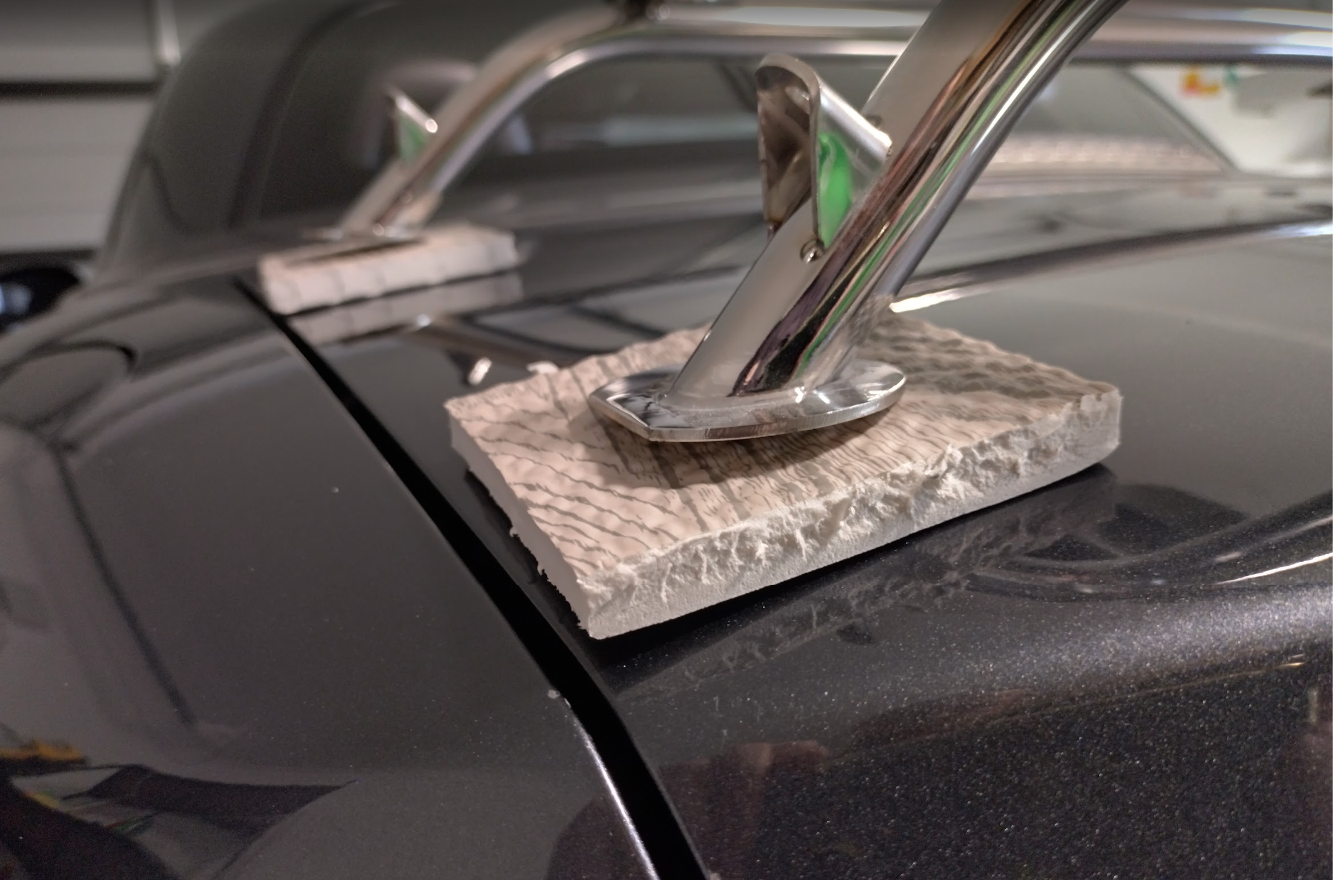
The fitting is extremely close, the side brackets would work just needs slightly longer bolts, even the strap for the front would fit but it’d be tight. The glaring issues though are:
- The roof definitely won’t open – The rear roof cover that lifts first bumps right into it until it’s moved about 10cm back – meaning the rear feet don’t have anything to sit on.
- The feet are flat whereas the boot is very curved
- The front bracket would probably fit very tight as-is but it’ll block the roof
- The side screws are too short by 20-25mm.
So this is extremely not compatible with the PRHT – but that’s why we’re here so we can fix it up. And because it’s stainless steel we can adjust the depth. So my answer is to chop ~10cm out of each side, get longer bolts for the sides, get an extra bracket and bolt to span the bigger gap due to shortening the whole rack, and make some angled padded blocks for the feet so it sits flat and doesn’t damage the boot. Of course if you’re not worried about the roof opening/closing then you only need the padded feet and longer bolts for the sides. And if you’re not looking for a project and just want a rack, get the modern variant.
Shopping list
- 4 x rubber blocks of some sort, about 1cm thick. Made with a dense foam but not too dense, or a sandwich of neoprene and closed cell to spread the load and self-level to a degree. Update: I have made a 1cm high stepped neoprene circle which works as a test, and I discovered there’s yoga wedges for standing on which might work.
- 4 x M6 80-85mm stainless steel bolts for the additional gap to the sides
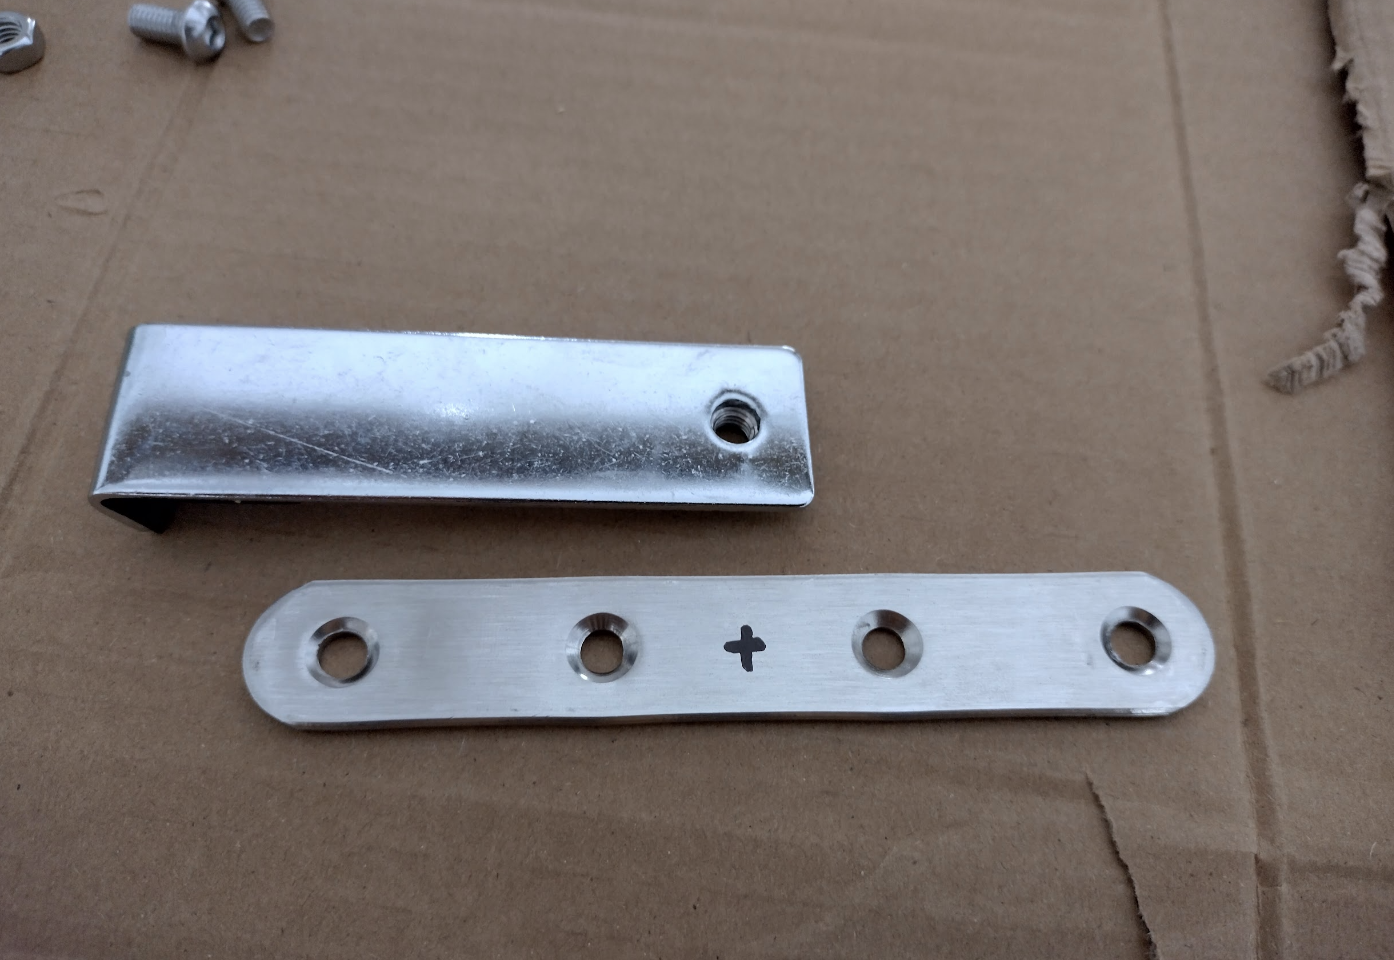
- 1 x small flat stainless steel bracket of 70mm x 25mm or so, in order to extend the factory front bracket.
- 1 x M6 12mm bolt and nut for the extended bracket
- 1 x Stainless Steel pipe cutter (22mm+) or a bi-metal/cobalt 32T hacksaw blade
- 2 x 100mm (18mm, 19mm, 20mm) stainless steel pipes for the sleeves – we don’t know the thickness of the steel yet but I’ll update this once I know. It’s 22mm pipe currently with a guess of around 1.5mm internal thickness due to the light weight (~3-4kg).
- 8 x M4 8mm / M3.4 6mm stainless steel rivets for the sleeves – get some spares
- 1 x 4.2mm / 3.5mm or so cobalt drill bit
- Epoxy (Araldite) for the sleeve adhesive – get the slow cure, and make sure it’s fantastic on stainless steel.
- Loctite 243 for the various bolts around everywhere
- PPF for underneath the rubber – I already have some of this ready but it’s a good idea if you’re using a removable luggage rack like these.
I can get to cutting before everything else arrives, to make sure I can get the sizing right. That’ll be the next update.
Cutting the rack
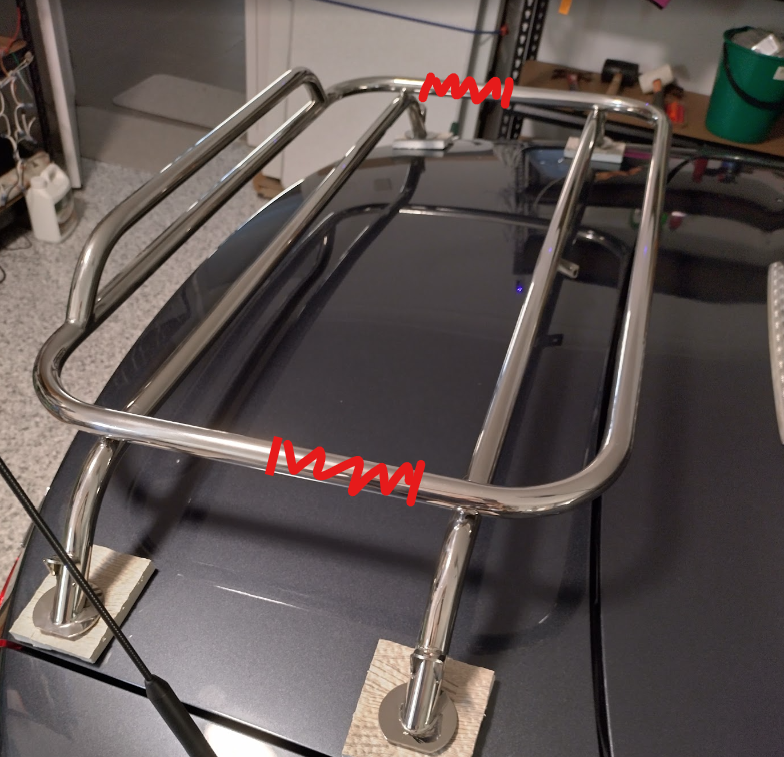
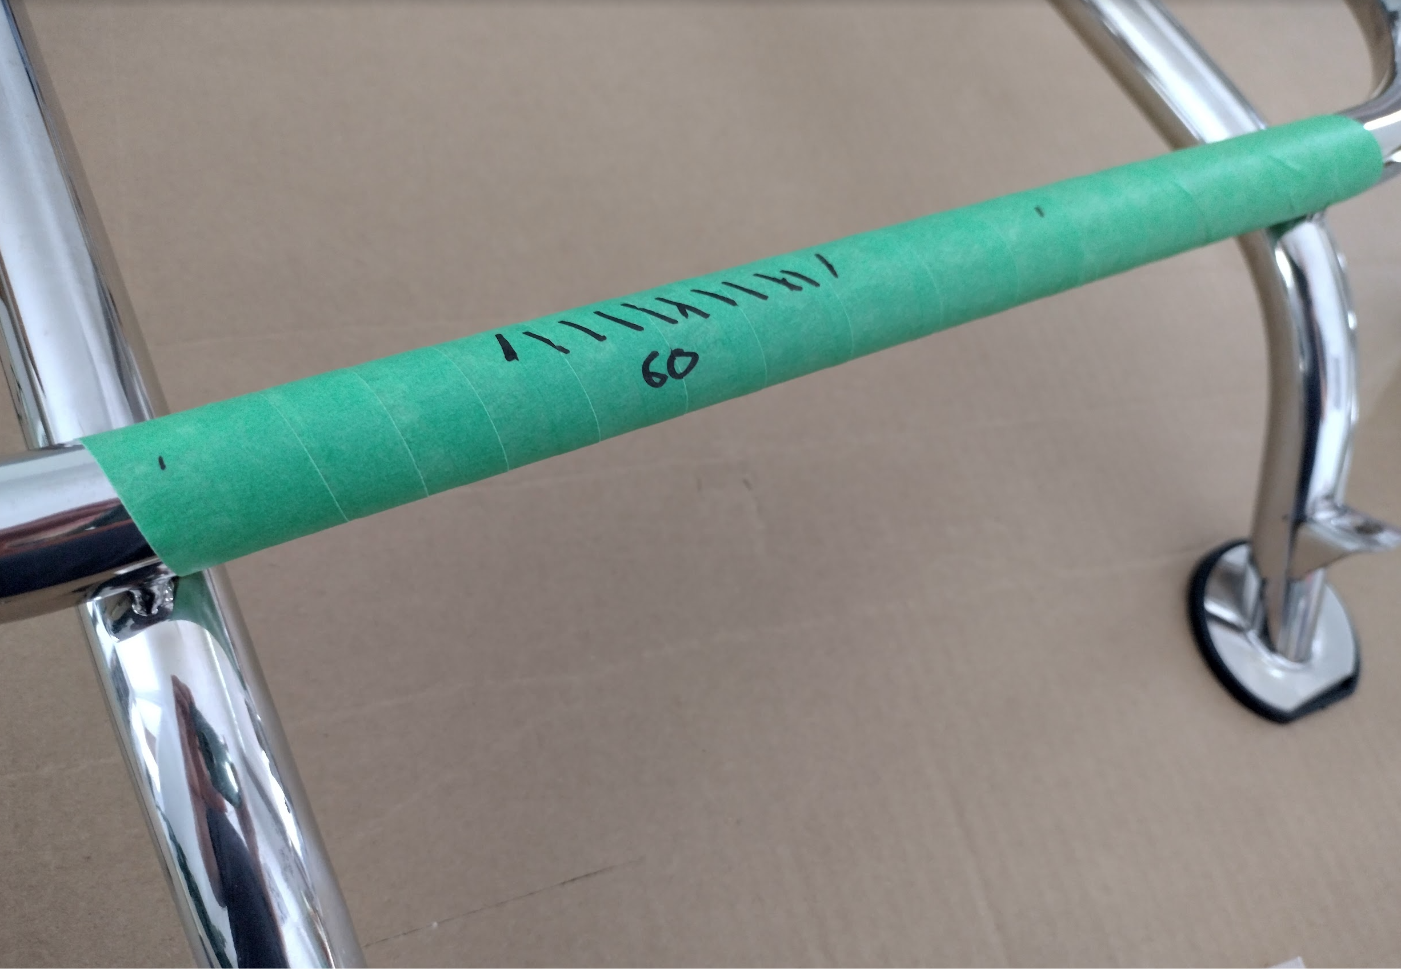
We need to shrink the rack by ~6cm in order to clear the folding mechanism of the roof, and allow the grippy feet to have a straight bit of boot lid to hold on to. So the plan is to cut the forward 6cm out of one side, and the rear 6cm from the other side to stagger the joins in order to make it a little stronger (not one straight across weak point).
The joins will be made with internal stainless steel sleeve pipes slightly smaller than the original tube so they will be a tight fit, and to glue and rivet them in place. The rivets will be placed on the inner edges and the bottom, staggered to prevent any straight through sheer point. This should allow it to keep the vintage/classic appearance and remain strong enough to hold the ~20kg it’s rated for.
The bar that connects to the forward edge of the boot lid will be extended with a stainless bracket and bolts, to prevent the rack from sliding backwards.
In addition just because I overdo it a bit, I’ll be strapping the bags on from front to back primarily, to ensure the front and back half of the rack don’t separate with a load.
Update: It was originally 10cm, but I have just measured again and tested the roof and 6cm leaves more than enough room and gives me 4cm of rack back hopefully making it even more stable.
3rd brake light
Because the rack is blocking the 3rd brake light on the MX5/Miata, we need to add what’s called a temporary 3rd brake light. Here there doesn’t seem to be any requirement on leds and such, just that it needs to be visible a certain distance away. The height will be about the same as the original.